Maps, GPS and offline
Navigate around the property with the project map, mark waypoints, record tracks, and download maps to the phone before you lose signal. Mapping and GPS tools are part of Pro and Max. For planning in the office, the same map opens in a web browser.
7.1The project map Pro
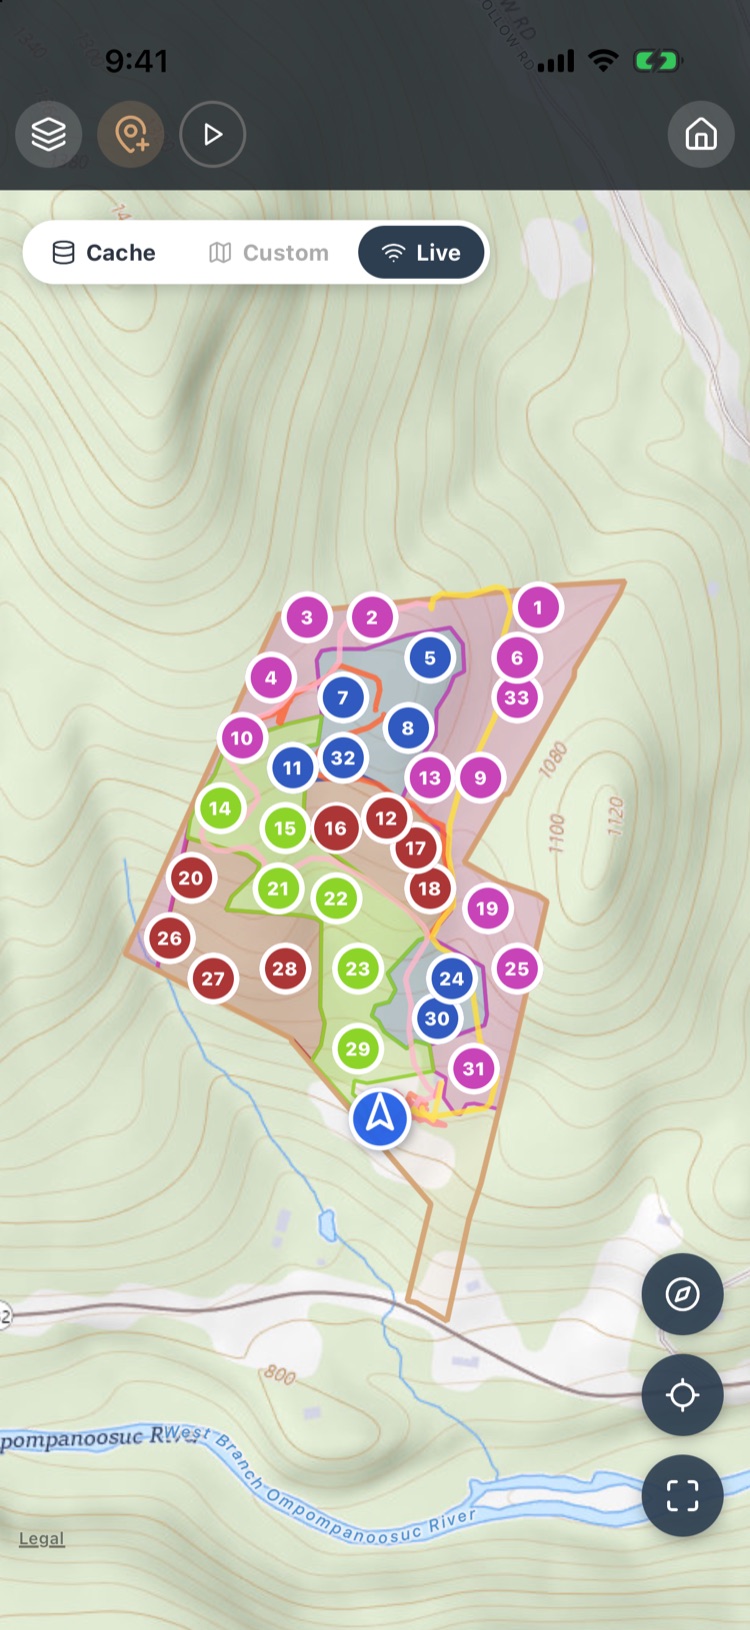
Tap Map at the top of Project Home. The map shows the project boundary, the stands in their colors, the numbered plots, and your position as a blue arrow pointing in the direction the device points.
- Top left: the layers menu (section 7.2), add a waypoint (section 7.4), and start or stop a track (section 7.5).
- Top right: back to Project Home.
- Map source: Cache uses the map saved on the phone, Custom your imported map, and Live downloads as you go (section 7.7).
- Bottom right: point the map north, follow your position, and fit the whole property on the screen.
Pinch to zoom, drag to pan, and twist with two fingers to rotate.
7.2Layers and basemaps
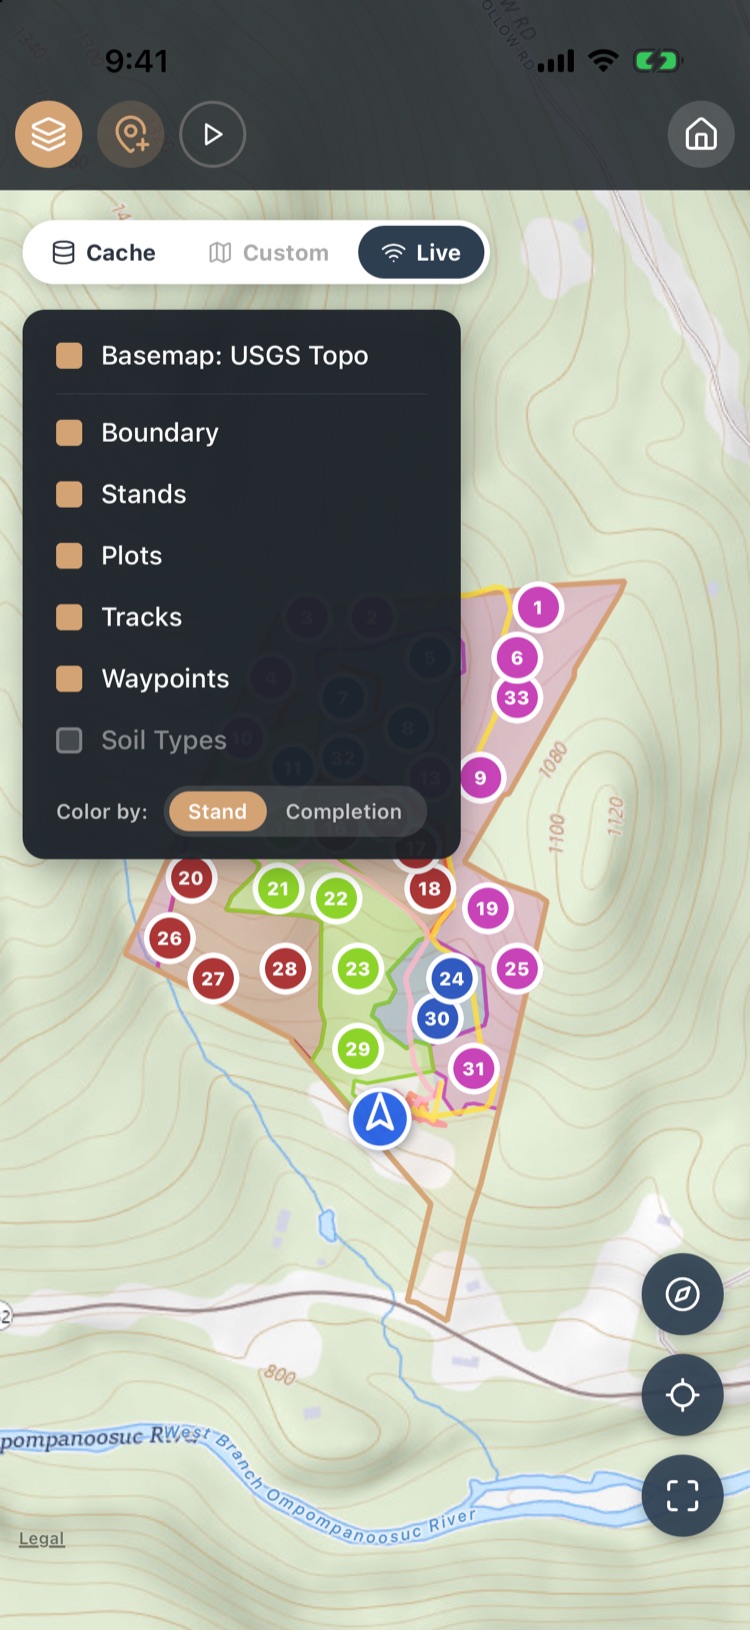
Tap the layers button at the top left. Tick what you want to see:
- Boundary, Stands and Plots.
- Tracks: the paths you’ve recorded.
- Waypoints.
- Soil Types Max (section 7.6).
Color by colors plots by Stand, or by Completion: green for plots that are done, red for those still to do.
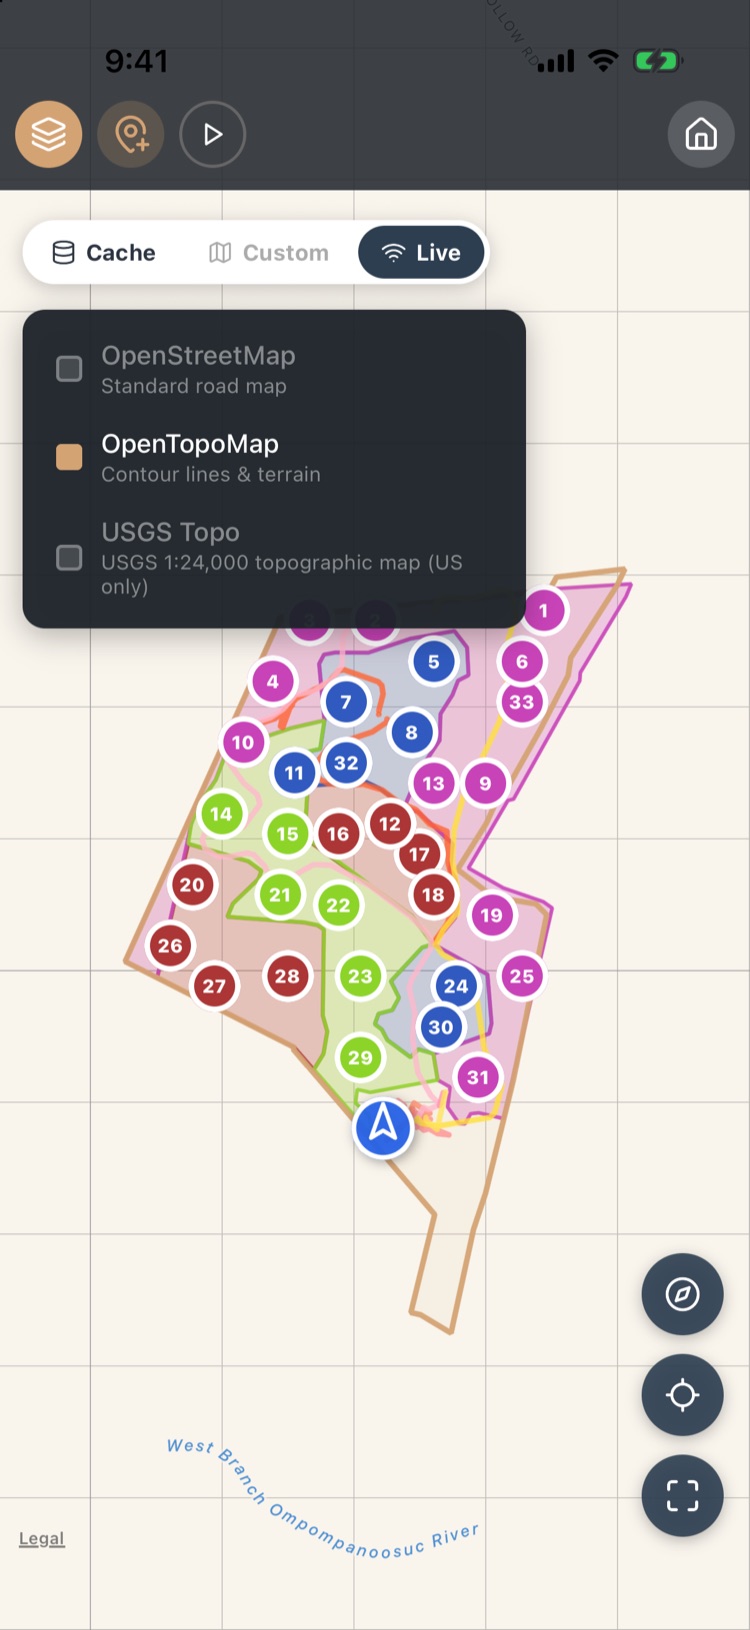
Tap Basemap to choose the map underneath:
- OpenStreetMap: a standard road map.
- OpenTopoMap: contour lines and terrain.
- USGS Topo: the USGS 1:24,000 topographic map, US only.
7.3Plots on the map
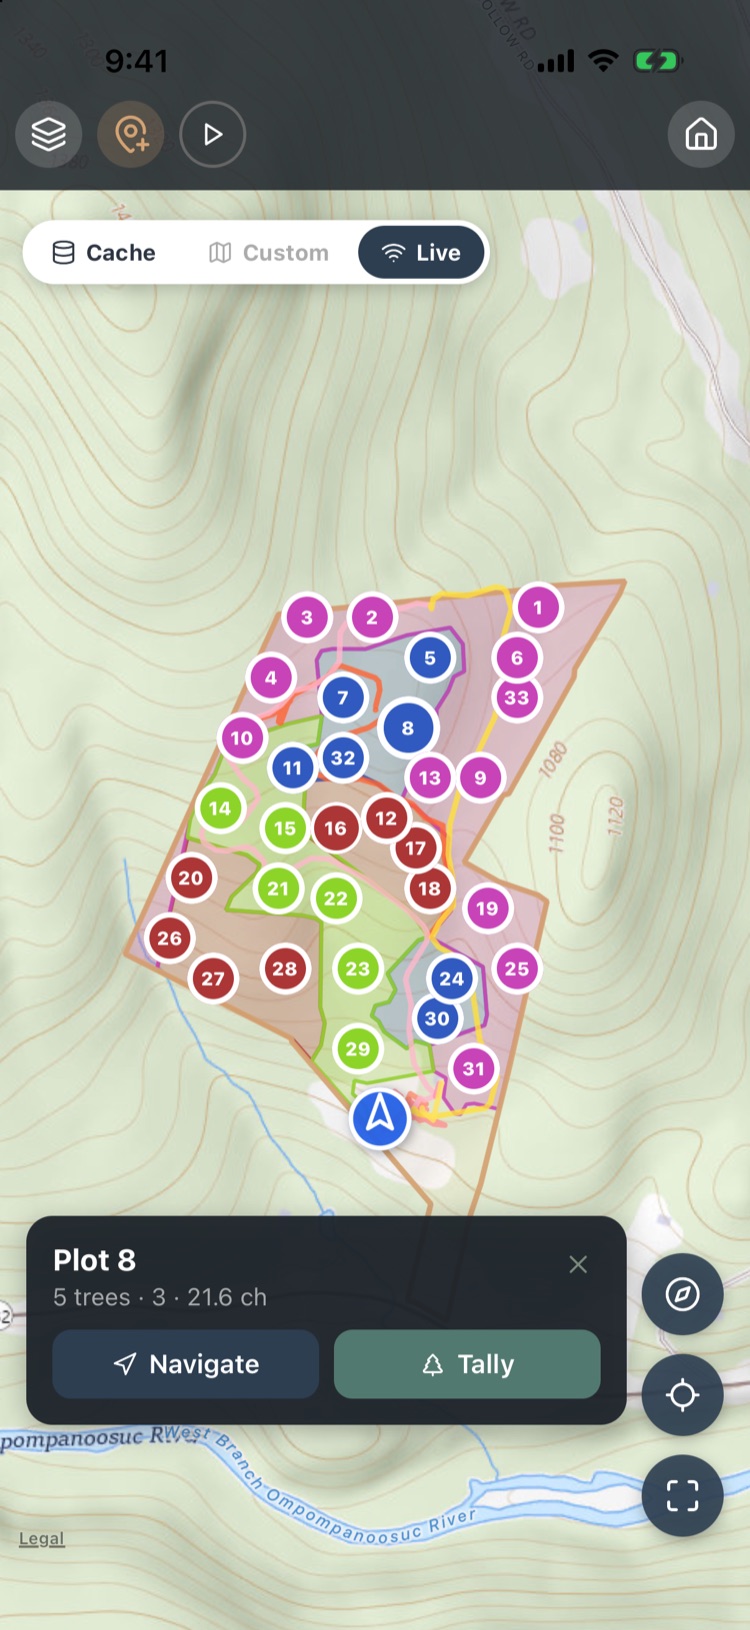
Tap a plot marker. A card shows the plot number, its tree count and how far away it is.
- Navigate guides you with live distance and bearing (Chapter 4, section 4.5). When you get close, the phone can play a tone; set the distance under Settings › GPS › Navigation alerts.
- Tally opens the plot’s tally screen.
To move a plot, use the boundary editor’s Edit Plots mode (Chapter 3, section 3.3).
7.4Waypoints
Waypoints mark anything worth finding again: a corner pin, a spring, a stand of invasives, a culvert.
- Tap the waypoint button (the pin with a +) on the map, or on Project Home.
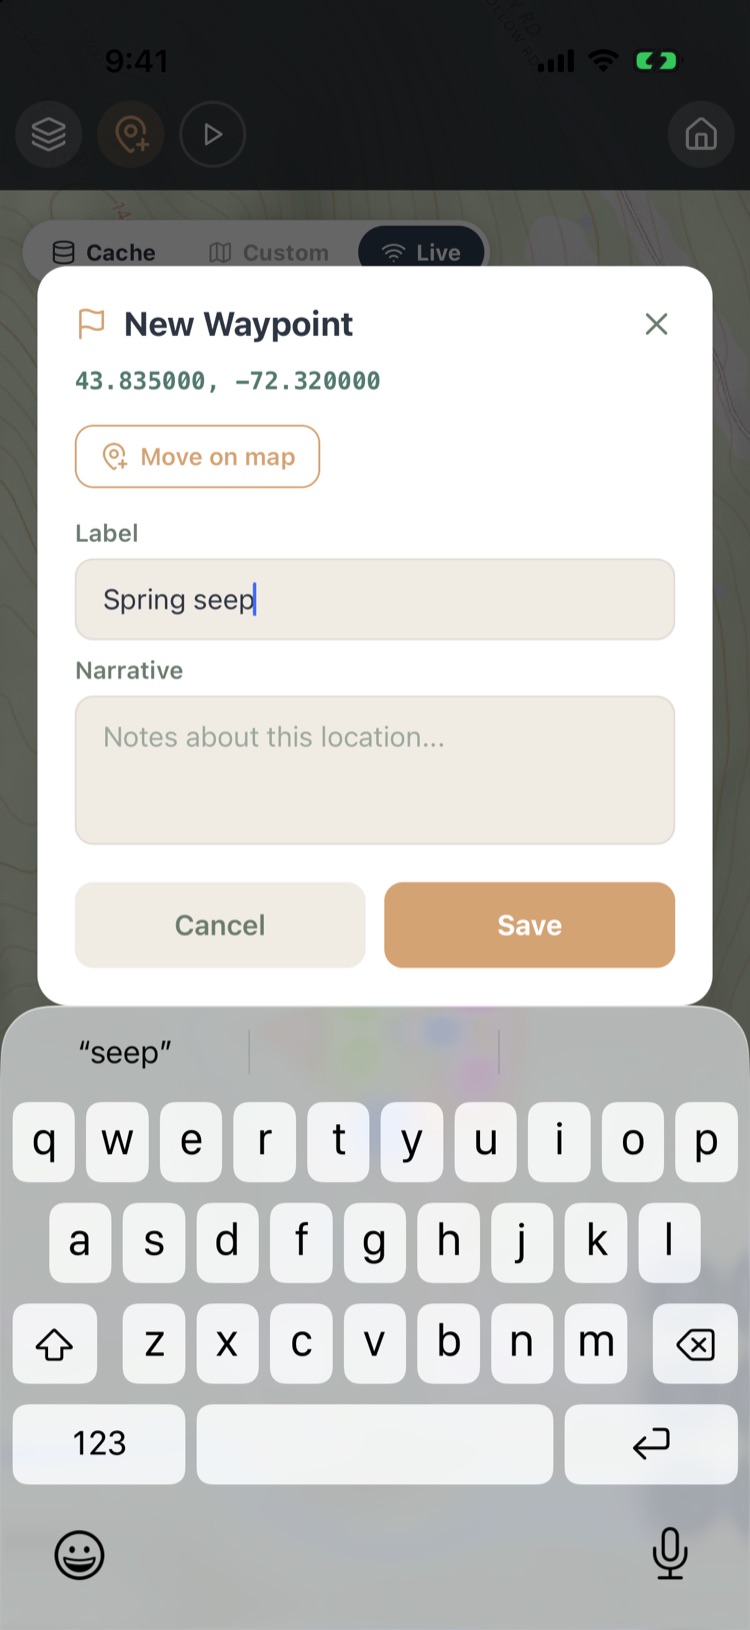
- The app records your position, averaging several readings if you’ve set that up (section 7.9). The coordinates show at the top.
- To put it somewhere else, tap Move on map and tap the spot.
- Give it a Label and, if you like, a Narrative. Tap Save.
Tap a waypoint on the map to see, edit or delete it. Waypoints appear in the KML and map exports (Chapter 9).
7.5Recording a track
A track records the path you walk: a boundary you followed, the route to a landing, or proof of where the crew went. Tap the ▷ button on Project Home or the map to start; it turns into a stop button while recording, and the map header says Recording…. Tap it again to stop. Tracks show on the map and export with the project.
Let it record with the screen off: iPhone and iPad
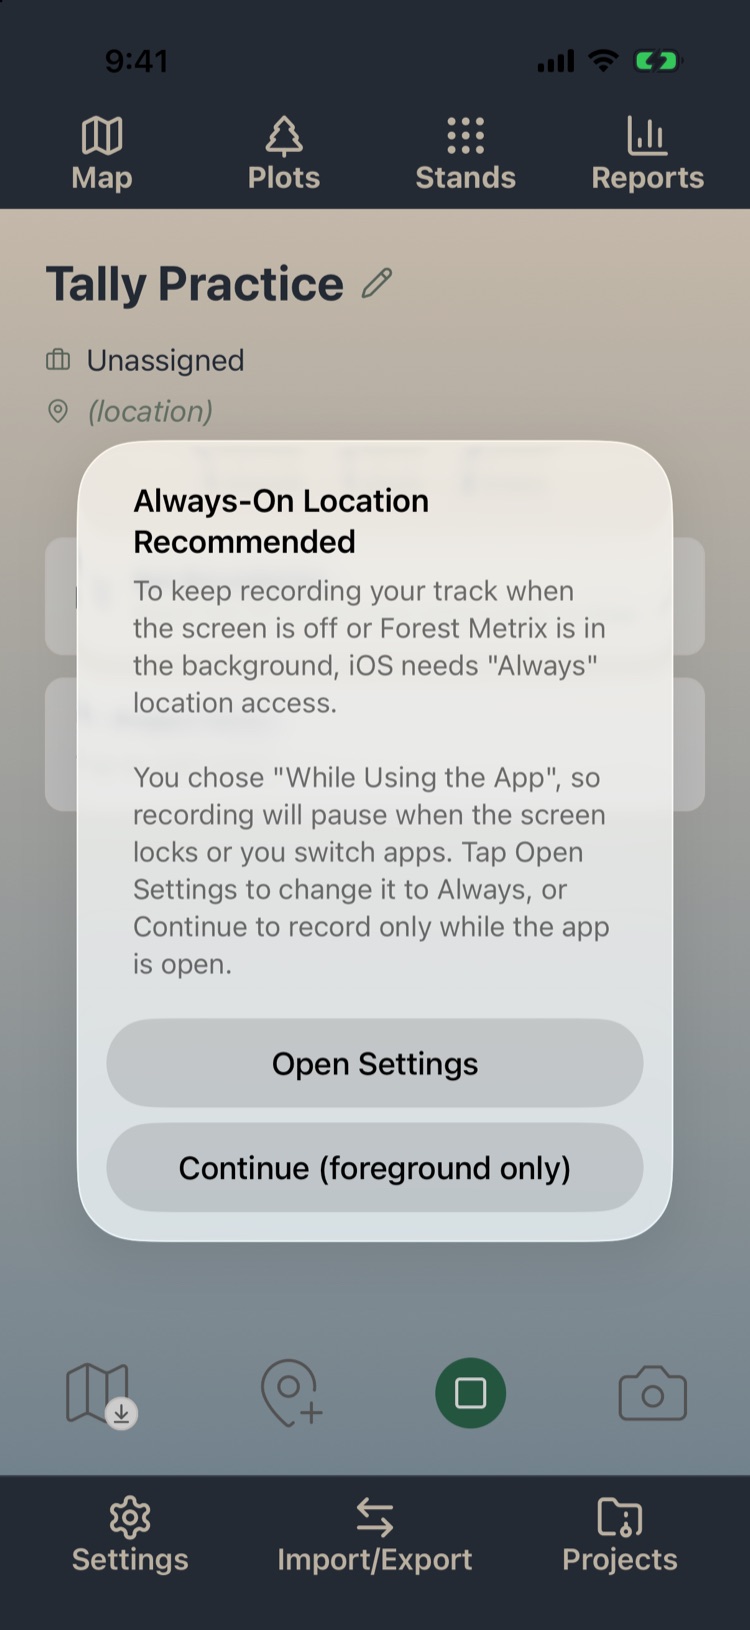
To keep recording when the phone is locked or in your pocket, iOS needs the app’s location access set to Always. The first time you start a track, iOS asks. If you choose Keep Only While Using, the app explains what that means and offers Open Settings.
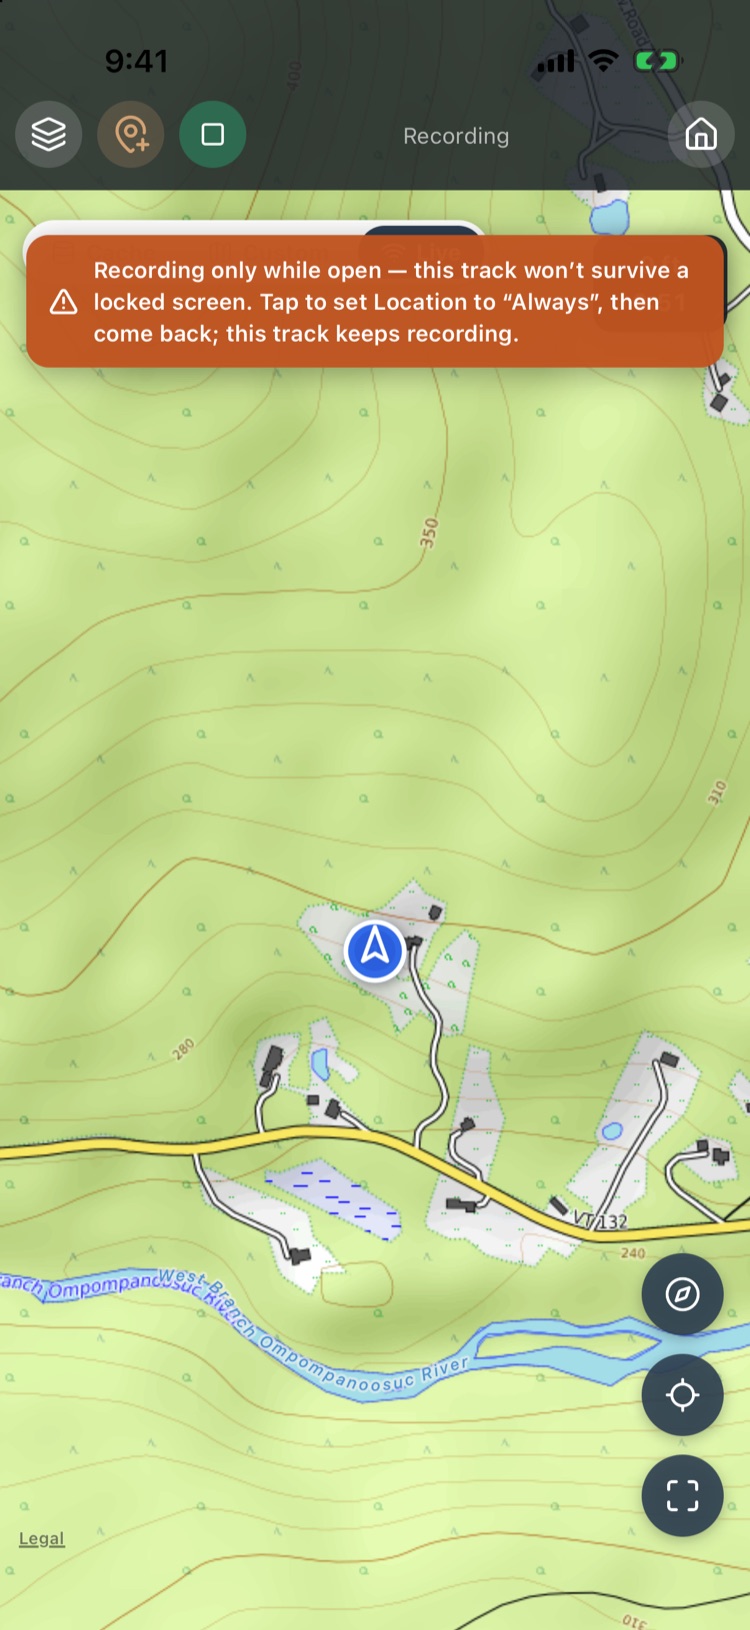
While recording with “While Using” access, an orange banner says the track stops when the screen locks. Tap it to open Settings, set Location to Always, and come back; the track keeps going.
Let it record with the screen off: Android
On Android, a track keeps recording in the background when location access is set to Allow all the time. The first time you start a track:
- Android asks for location access. Allow it; without it, no track starts.
- Android then asks for location all the time. On newer phones this opens the app’s location settings; choose Allow all the time. If you keep While using the app, the app explains and offers Open Location Settings or Continue (foreground only). It asks again each time you start a track until background access is allowed.
- Allow notifications. While a track records in the background, Android shows a notification, Forest Metrix GPS Track · Recording GPS track in background…; without it, Android stops the recording when you leave the app.
- The app may then ask to keep GPS recording alive by letting it run without battery restrictions. Some phones stop background apps to save battery and cut tracks short, so tap Allow. You can check this later under Settings › GPS.
As on iPhone, recording with While using the app shows an orange banner on the map; tap it, allow All the time, and come back, and the same walk keeps recording.
How often a track records a point, and how accurately, is set under Settings › GPS (section 7.9).
7.6Soil types Max
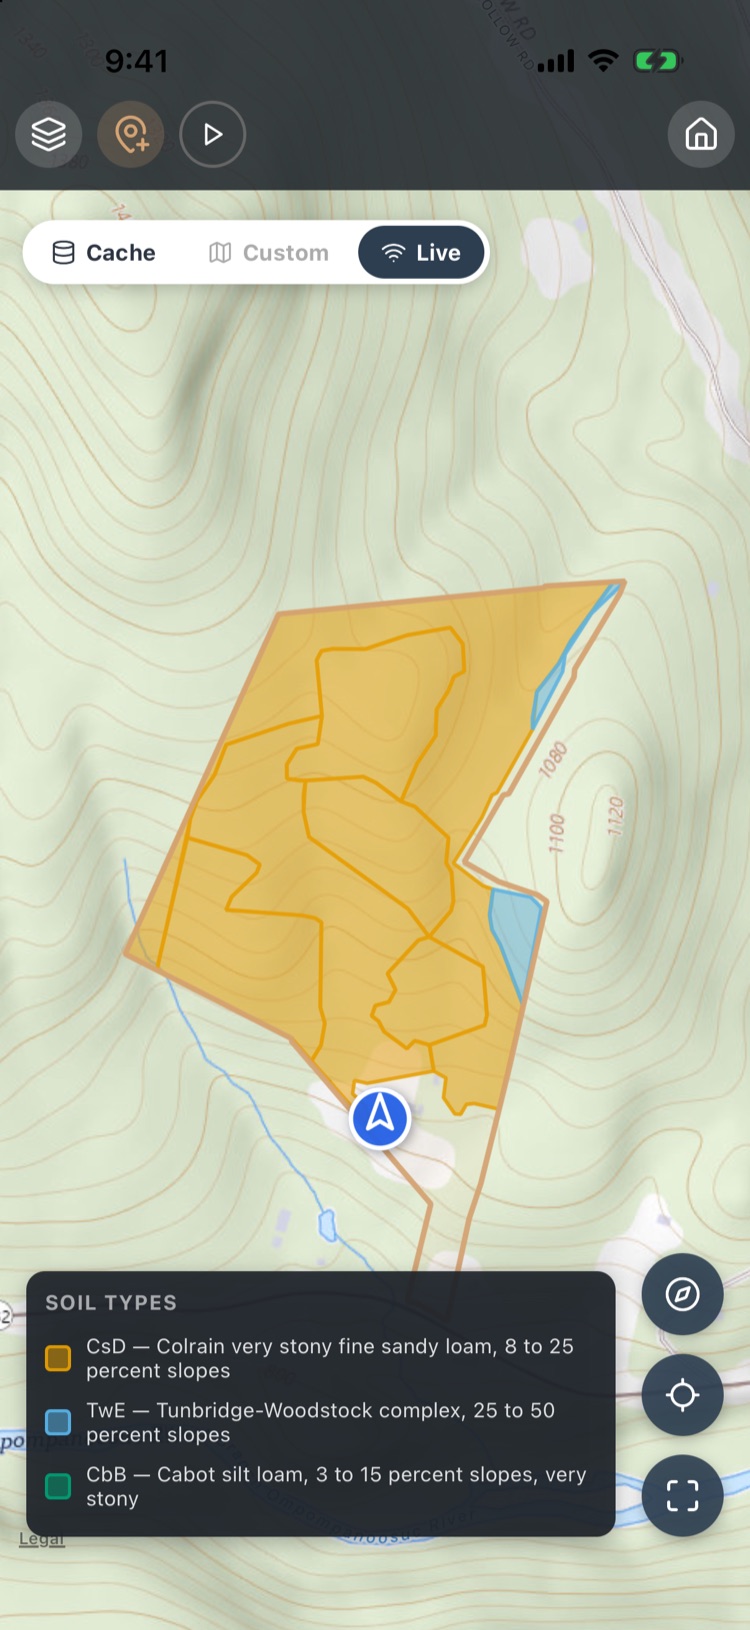
Tick Soil Types in the layers menu to draw the NRCS soil map units over the property, colored by soil with a legend. The first time, the app downloads the soils for the boundary and each stand: Fetching NRCS soil 0/4. Afterwards they’re stored with the project and work offline.
If the download doesn’t finish, the banner reads Tap to load soil outlines from NRCS; tap it to try again. The NRCS service needs a connection and is sometimes down for maintenance.
Soil components and site index for each stand are on the stand’s NRCS Soil Data screen (Chapter 3, section 3.12).
7.7Working offline
Forest Metrix is built for places with no signal. Your project data is always on the phone. The map is saved independently, and you need a connection to download it once.
- Data: everything you enter is saved on the phone first and uploads when you’re back in coverage (Chapter 12).
- Maps: the map for the project area is saved when you open the project’s Map, when you tap the map icon at the bottom of Project Home, and when you draw or change the boundary on this phone. The map icon shows a check mark when the map is saved; until then it shows a download arrow. On the map, Cache shows the saved map.
While you still have Wi-Fi, open each project you’ll cruise and tap the map icon at the bottom of Project Home (or open its Map). Wait for the check mark. If you didn’t download a project’s map in advance and don’t have a cell connection, you won’t have a map in the woods.
Map Details
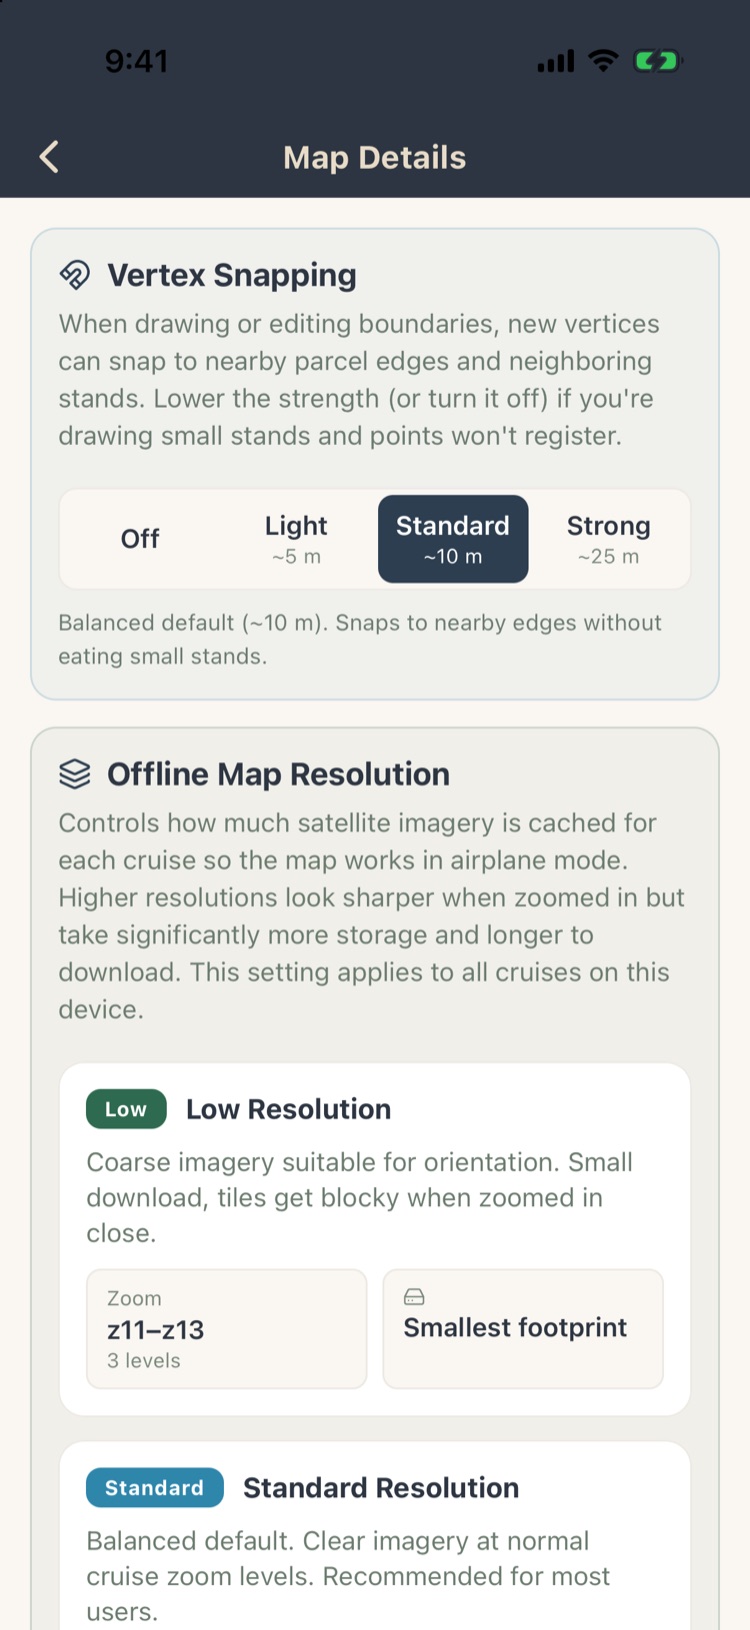
Settings › Map Detail controls the offline maps:
- Vertex Snapping: how strongly new corners snap to nearby parcel edges and stands when you draw (Off, Light, Standard, Strong).
- Offline Map Resolution: Low, Standard, High or Maximum. Higher levels look sharper when zoomed in but take longer to download and more storage. Standard suits most users.
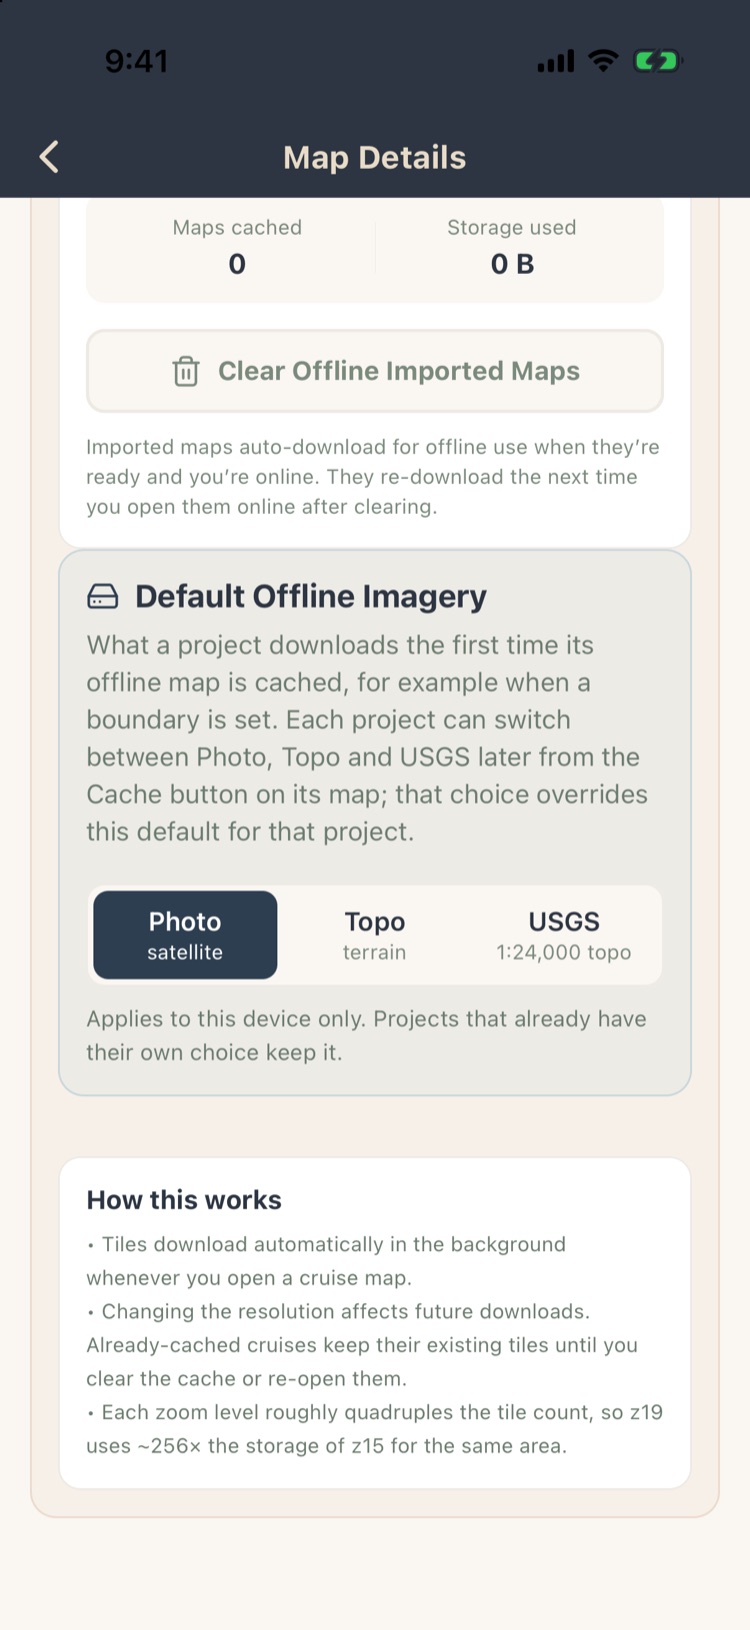
- Storage: how much the saved maps use, and buttons to clear them. Imported PDF maps are counted separately.
- Default Offline Imagery: Photo (satellite), Topo or USGS (1:24,000), for projects that haven’t chosen yet.
Caching
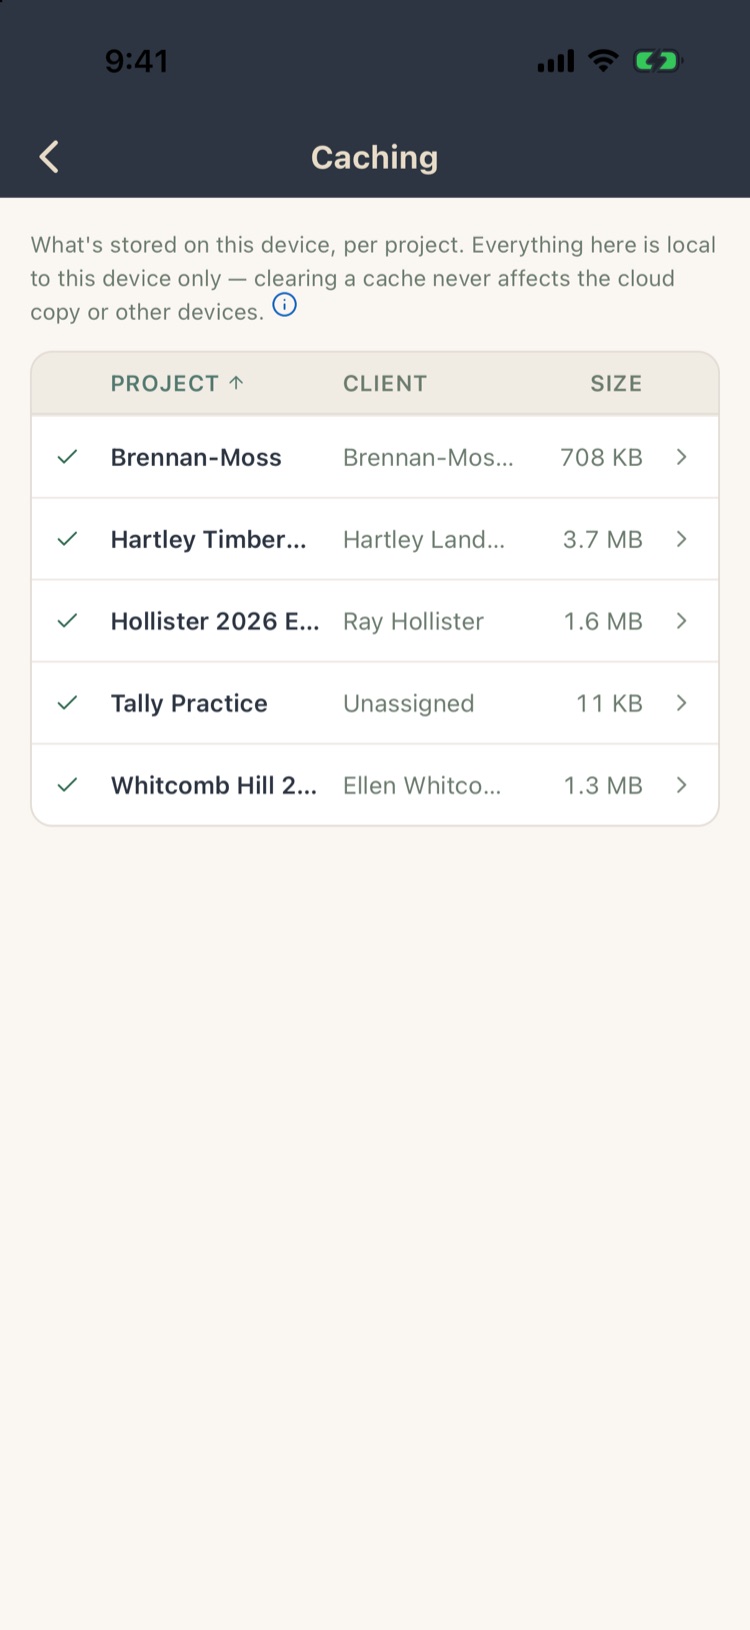
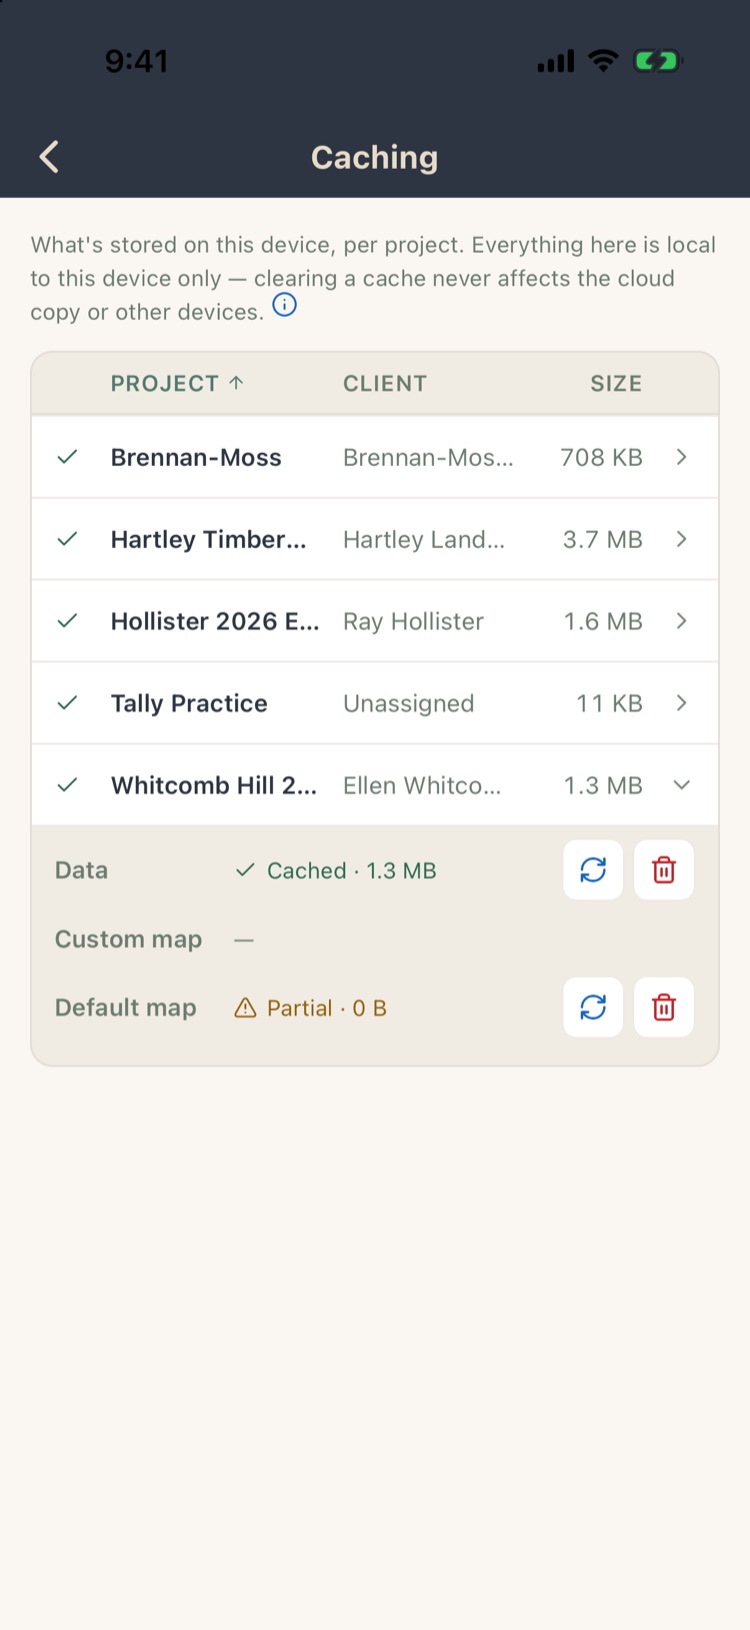
Settings › Caching lists every project on the phone with its client and how much storage it uses. Tap a project to see:
- Data: cached or not, and its size.
- Custom map: your imported map, if any.
- Default map: the saved map tiles: Cached, Partial or not saved.
The ↻ button downloads again; the trash clears that part. Clearing a cache only affects this phone. The project stays in the cloud and on your other devices.
7.8Your own maps Max
You can bring in your own map and use it in the field, offline:
- A georeferenced PDF (a GeoPDF, up to 100 MB), such as a forest-management-plan map or a county map.
- USGS topo quads, which can be downloaded for individual projects (section 9.6).
Import them from Import/Export on Project Home (Chapter 9). Then choose Custom above the map to switch to it. Your position, plots and boundary draw on top as usual.
7.9GPS settings and accuracy
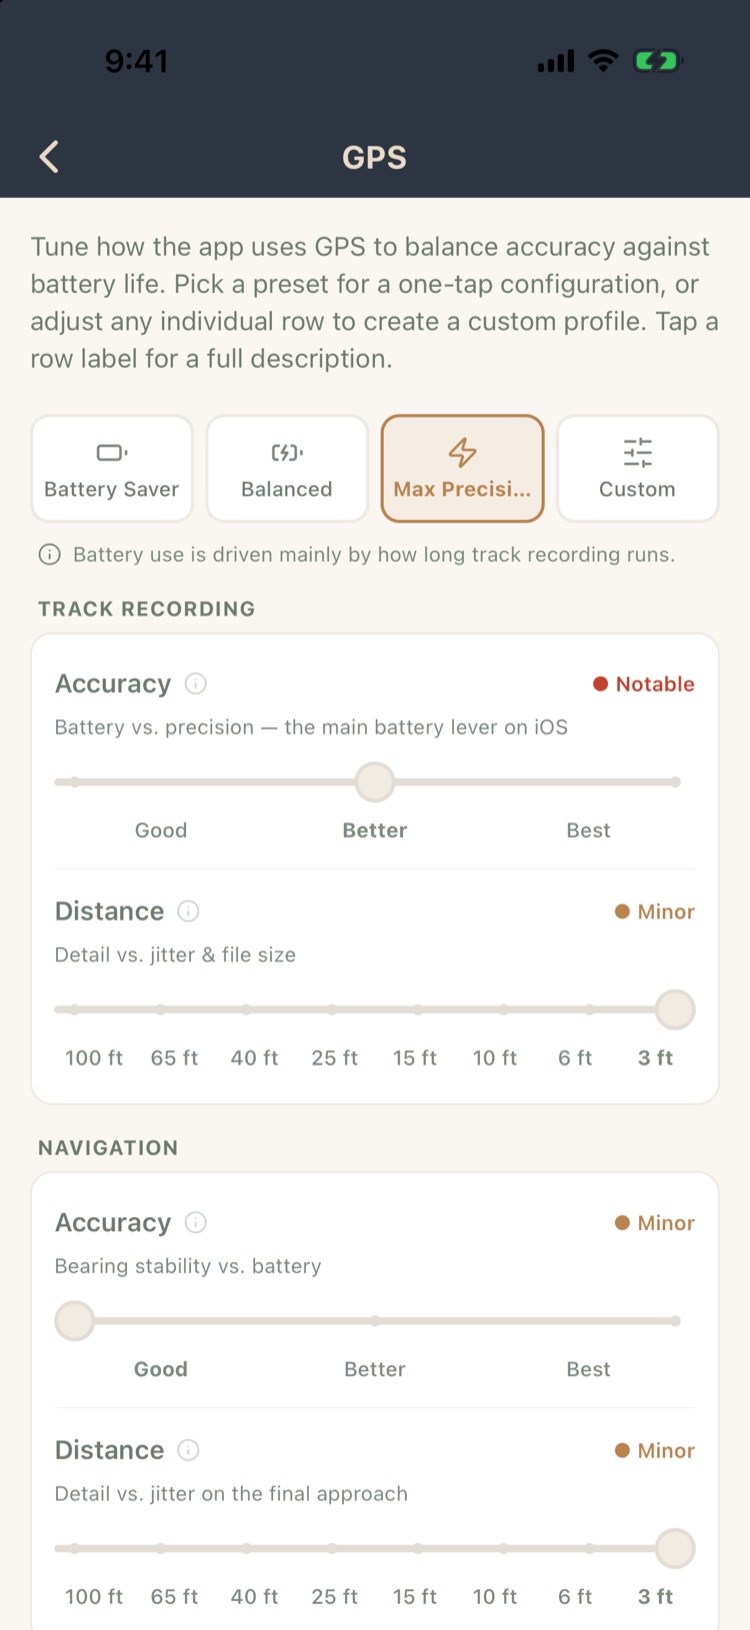
Settings › GPS trades accuracy for battery. Pick a preset:
- Battery Saver: for long days with lots of tracking.
- Balanced.
- Max Precision (the default): the highest accuracy, with the highest battery cost.
Changing any slider makes your own Custom profile. Each row shows its battery cost: none, minor or notable. Tap a row’s label for a full description.
- Track Recording and Navigation: accuracy, and how often or how far apart points are recorded.
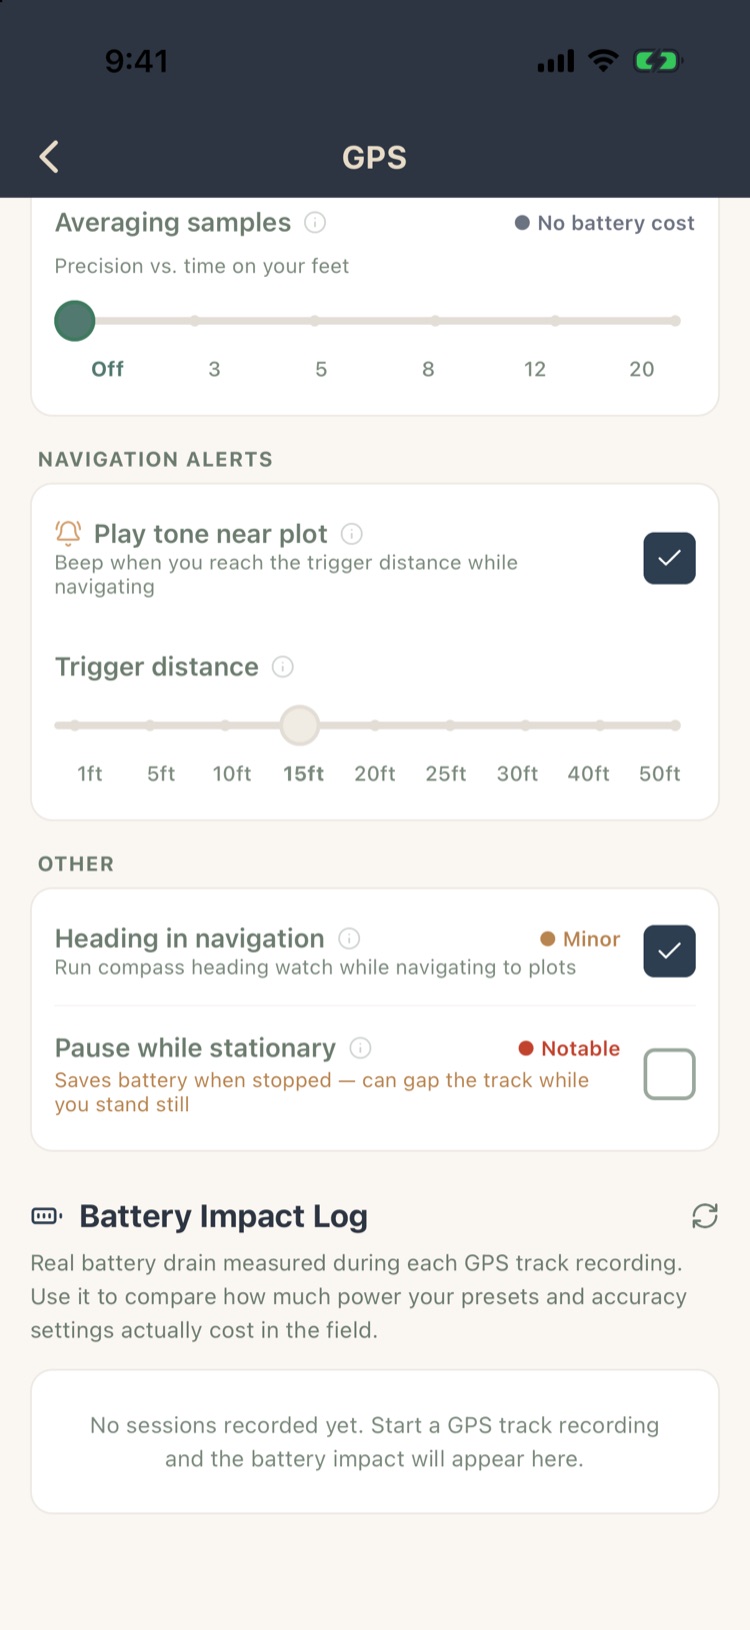
- Waypoint Capture › Averaging samples: how many readings are averaged for each waypoint and plot center: Off, 3, 5, 8, 12 or 20. Each adds about a second of standing still. Averaging reduces scatter but can’t correct the bias a heavy canopy causes. This setting isn’t changed by the presets.
- Navigation Alerts: play a tone near the plot, and at what distance.
- Heading in navigation and Pause while stationary (saves battery when you stop, but leaves a gap in the track).
- Battery Impact Log: how fast the battery actually drained during each recording, to compare settings.
Let the phone see the sky for a moment before you capture a plot center. Hold it away from your body, and wait for the blue arrow to settle. Under a dense canopy, expect errors of tens of feet whatever the settings.
7.10The map on a computer
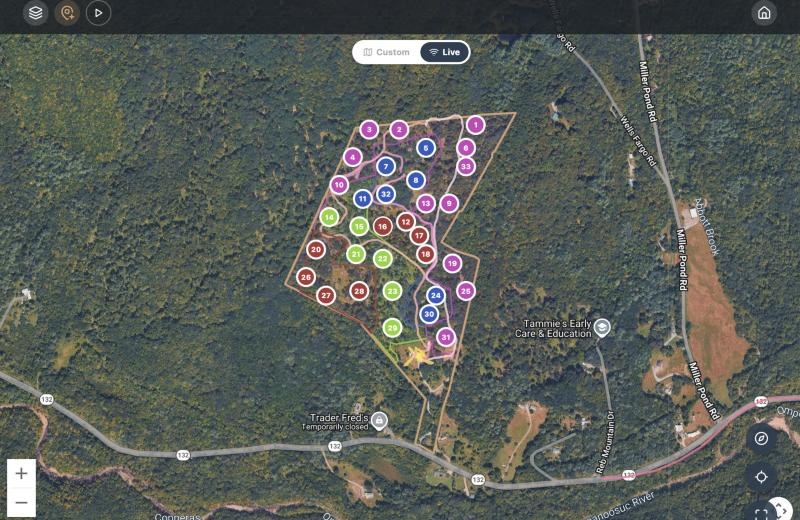
Everything in this chapter that doesn’t need you to be standing in the woods also works in a web browser. Go to app.forestmetrix.com on your computer, sign in with your usual login, open the project and click Map.
| In the browser | Phone only |
|---|---|
| The boundary, stands and plots, colored by stand or completion | Your position and the direction you face |
| The layers menu. The basemap starts on satellite imagery with road names | Recording a track (section 7.5) |
| Waypoints: click the map to place one, then label it | Navigating to a plot (section 7.3) |
| Your own imported maps, under Custom | Offline maps: the browser needs a connection (section 7.7) |
Use the browser to plan: check the layout against the imagery, see which plots are still red on the completion colors, and mark landings, crossings or a corner pin you found on a survey as waypoints. Then move plots and redraw boundaries in the editors (Chapter 3), which are easier with a mouse than a fingertip.
Changes you make in the browser save to the cloud straight away. Open the project on the phone while it still has a connection, and it picks up the changes within about a minute. Then save its map (section 7.7). The phone doesn’t re-save a map it already has, so if you expanded your boundary significantly, download the map again: Settings › Caching, tap the project, then ↻ next to the map (section 7.7).