Plot data
Setting up non-timber data: photos, notes, regeneration, snags, coarse woody material, and the custom fields, checklists and tables you need.
6.1The Observations screen
Each plot has an Observations screen. Open it from:
- the ☰ button on a plot row in the Plots list Pro, or
- the ☰ button on the tally bar, while you tally the plot.
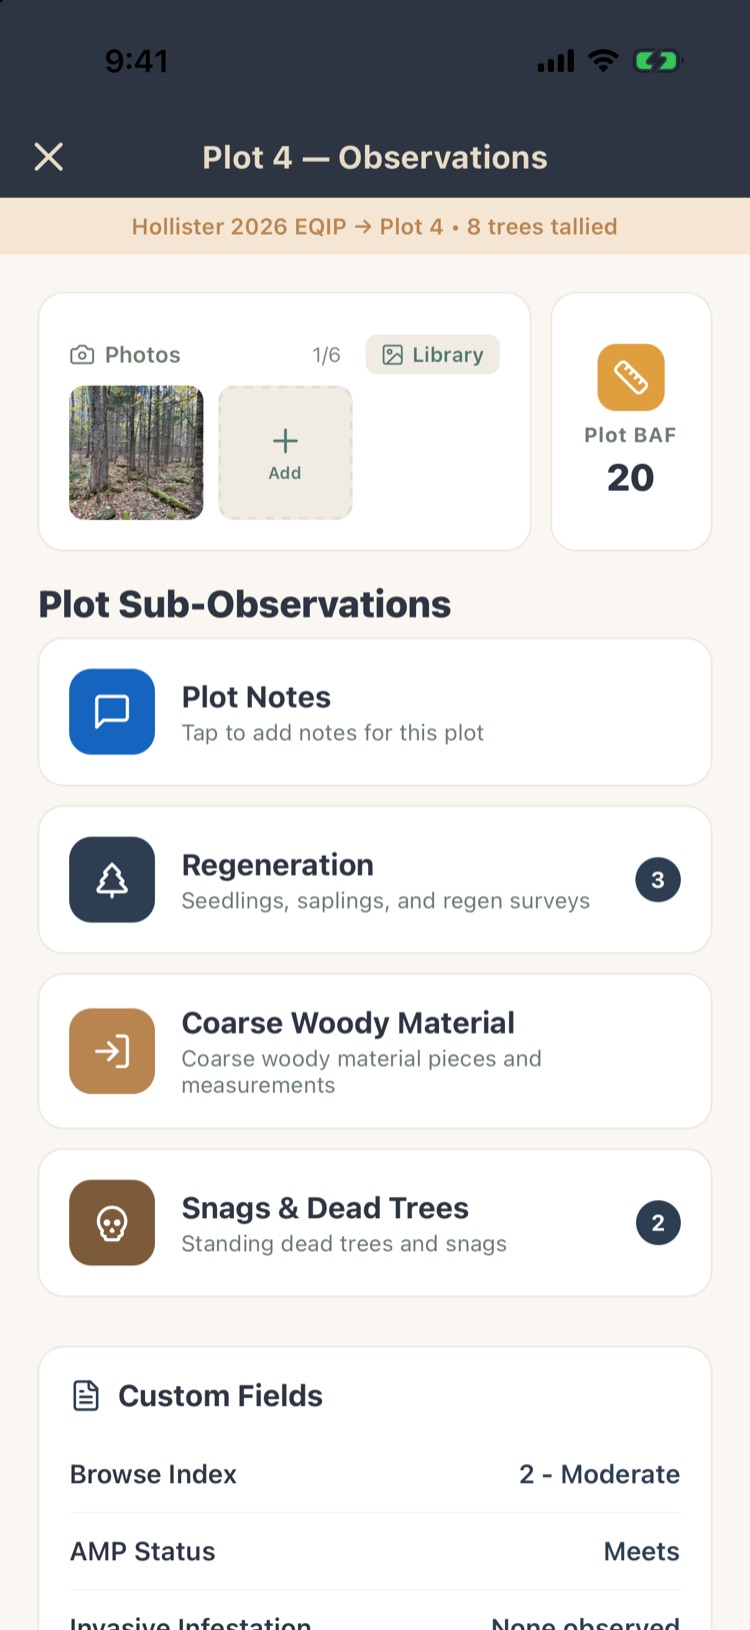
The banner gives the project, the plot and its tree count. Below it:
- Photos and the Plot BAF card (sections 6.2 and 6.3).
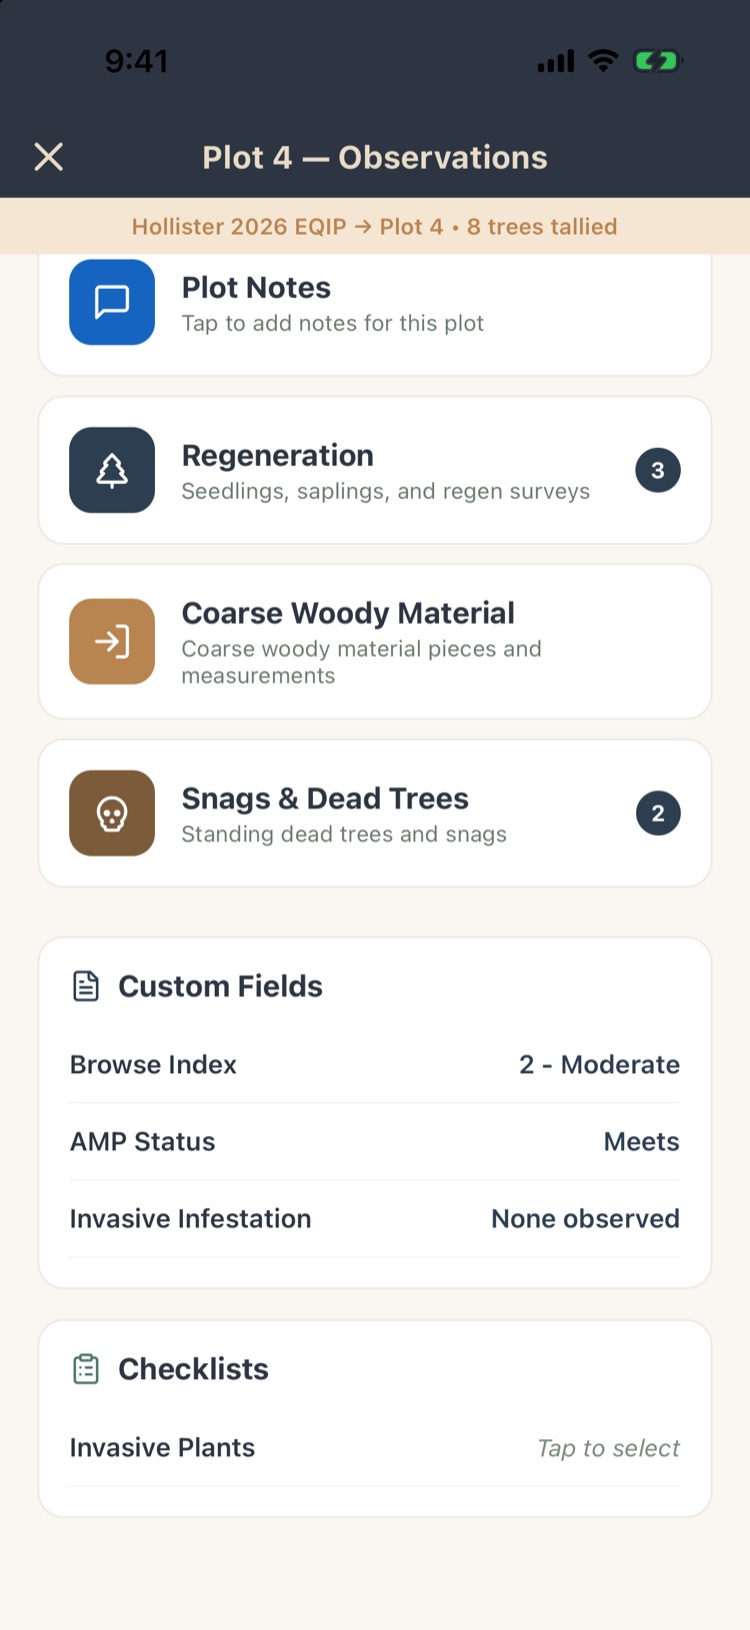
- Plot Sub-Observations: Plot Notes, Regeneration, Coarse Woody Material and Snags & Dead Trees, each with a count of entries. Which ones appear depends on your settings (section 6.9).
- Custom Fields, Checklists and Tables, if you’ve set any up Pro.
Tap × to go back. Everything saves as you go.
6.2Plot photos
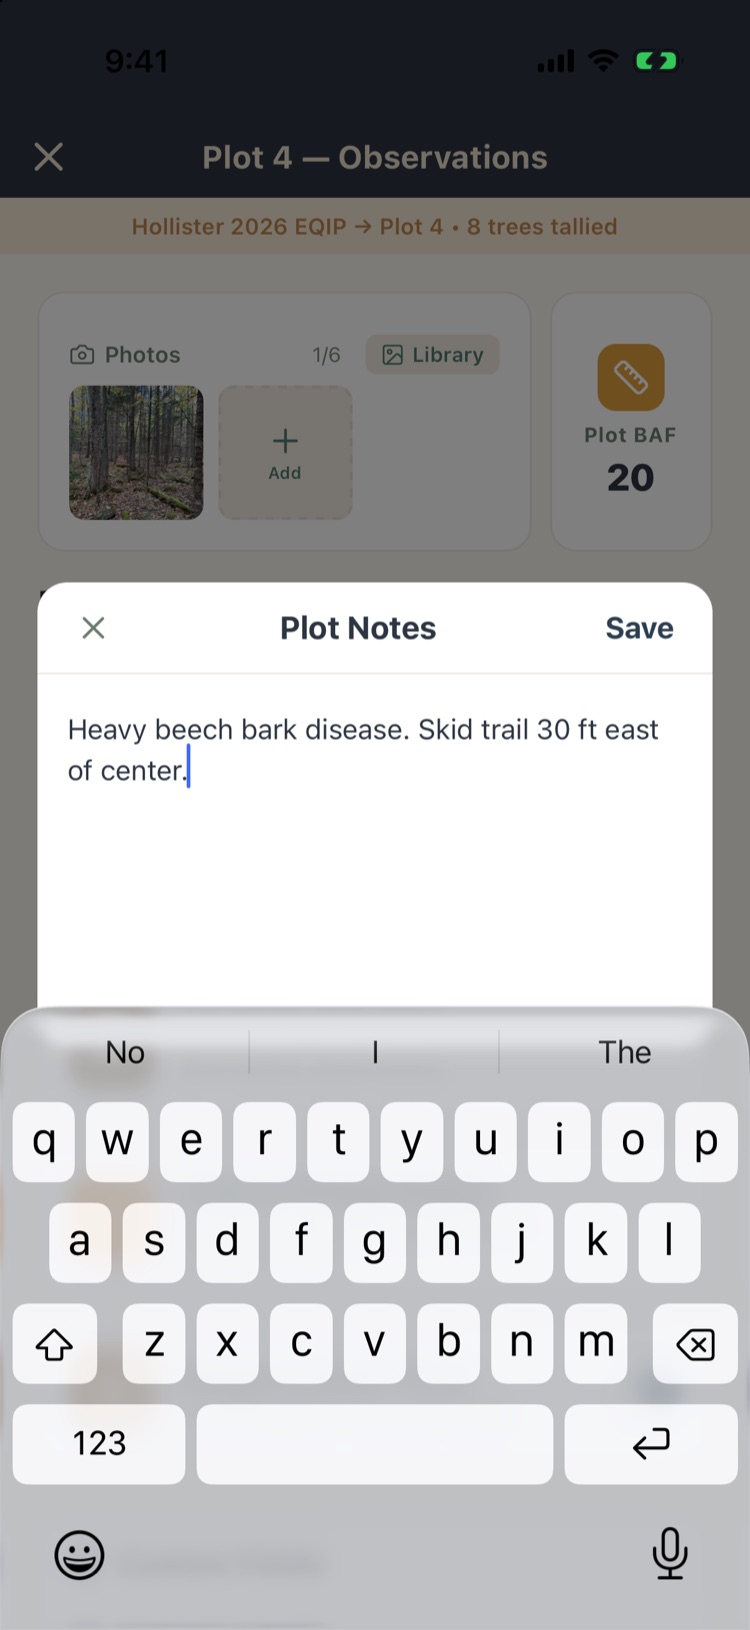
A plot can hold photos: a view from plot center, a damage example, canopy closure. The count beside Photos shows how many there are.
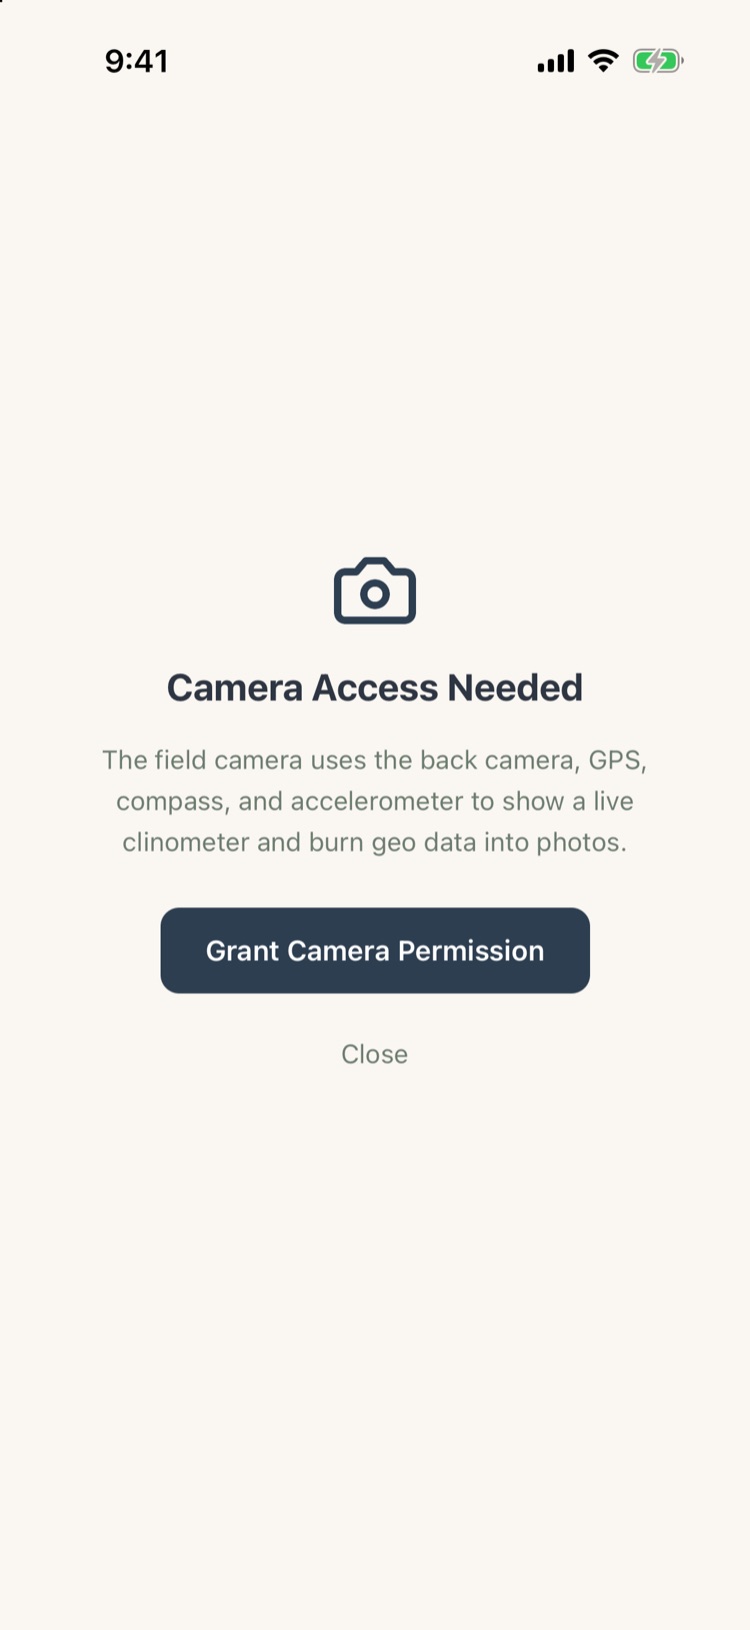
- + Add opens the field camera. The first time, it asks for camera access. It shows a live clinometer while you frame the shot. After you take it, turn on Stamp location on photo to print the coordinates, altitude, bearing, slope and time in a small box in the corner; the app remembers your choice. Photos from the library can’t be stamped.
- Library adds photos you already took.
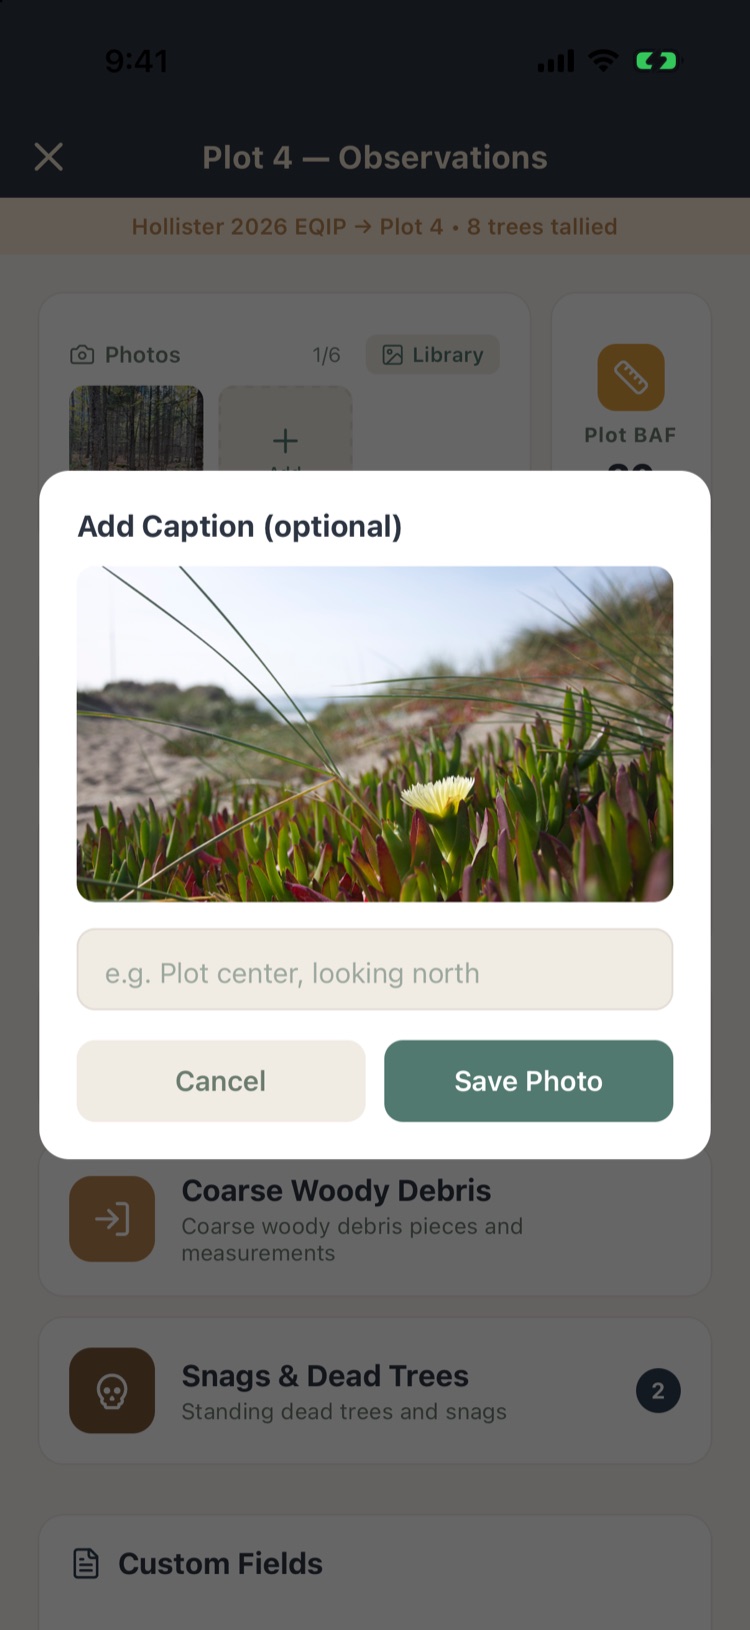
- Add an optional caption, such as “Plot center, looking north”, and tap Save Photo.
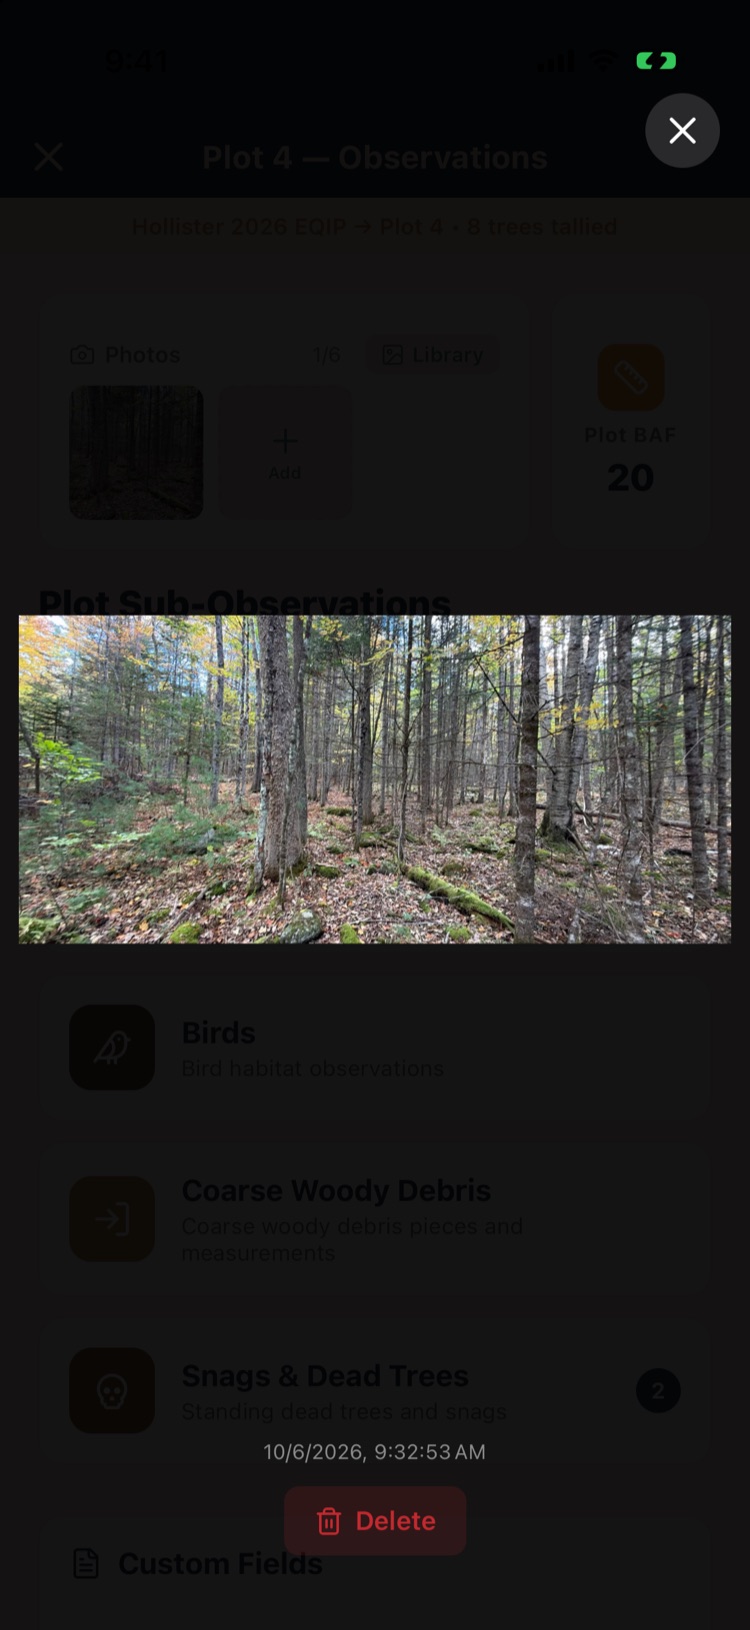
- Tap a thumbnail to see the photo full size with its date. Delete removes it.
Photos are stored on the phone first and upload when you have a connection, then appear in the office and on your other devices. Photo size, saving a copy to your camera roll, and Wi-Fi-only uploading are under Settings › Photos (Chapter 11). To export a project’s photos, see Chapter 9.
6.3Plot BAF
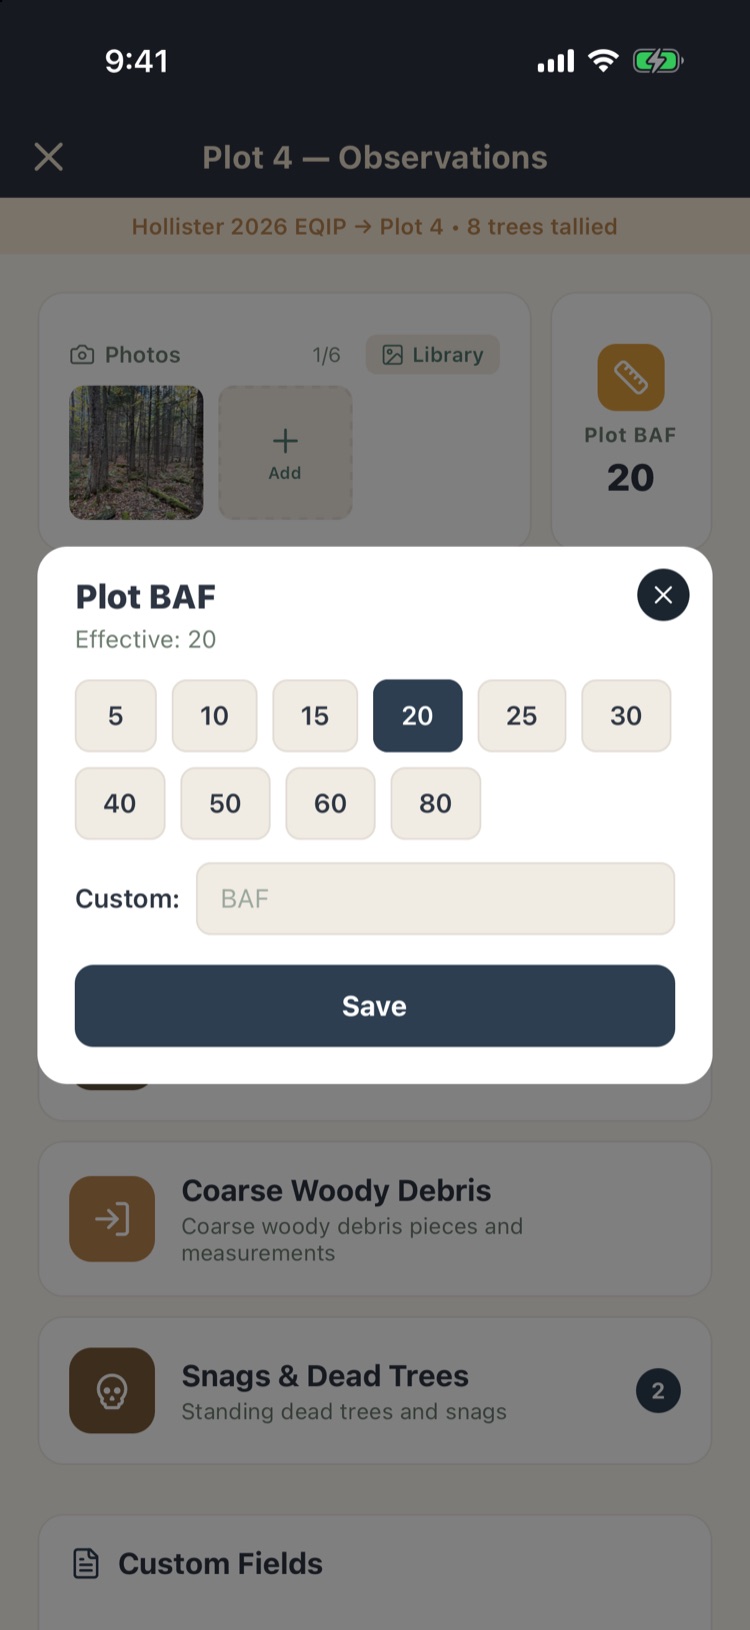
On variable-radius projects, the Plot BAF card shows the BAF used for this plot. Normally that’s the project’s or the stand’s. If you want to switch BAF for individual plots, tap the card, choose the BAF (or type one under Custom) and tap Save. Effective shows the BAF the plot’s trees are expanded with. Reset it to go back to the default.
6.4Plot notes
Tap Plot Notes to type anything about the plot: conditions, landmarks, a skid trail to avoid. Tap Save, or × to leave without saving. A saved note shows on the Plot Notes row and in the plot data reports and exports.
For a project-wide note, use Project Notes on Project Home (Chapter 2).
6.5Regeneration Pro
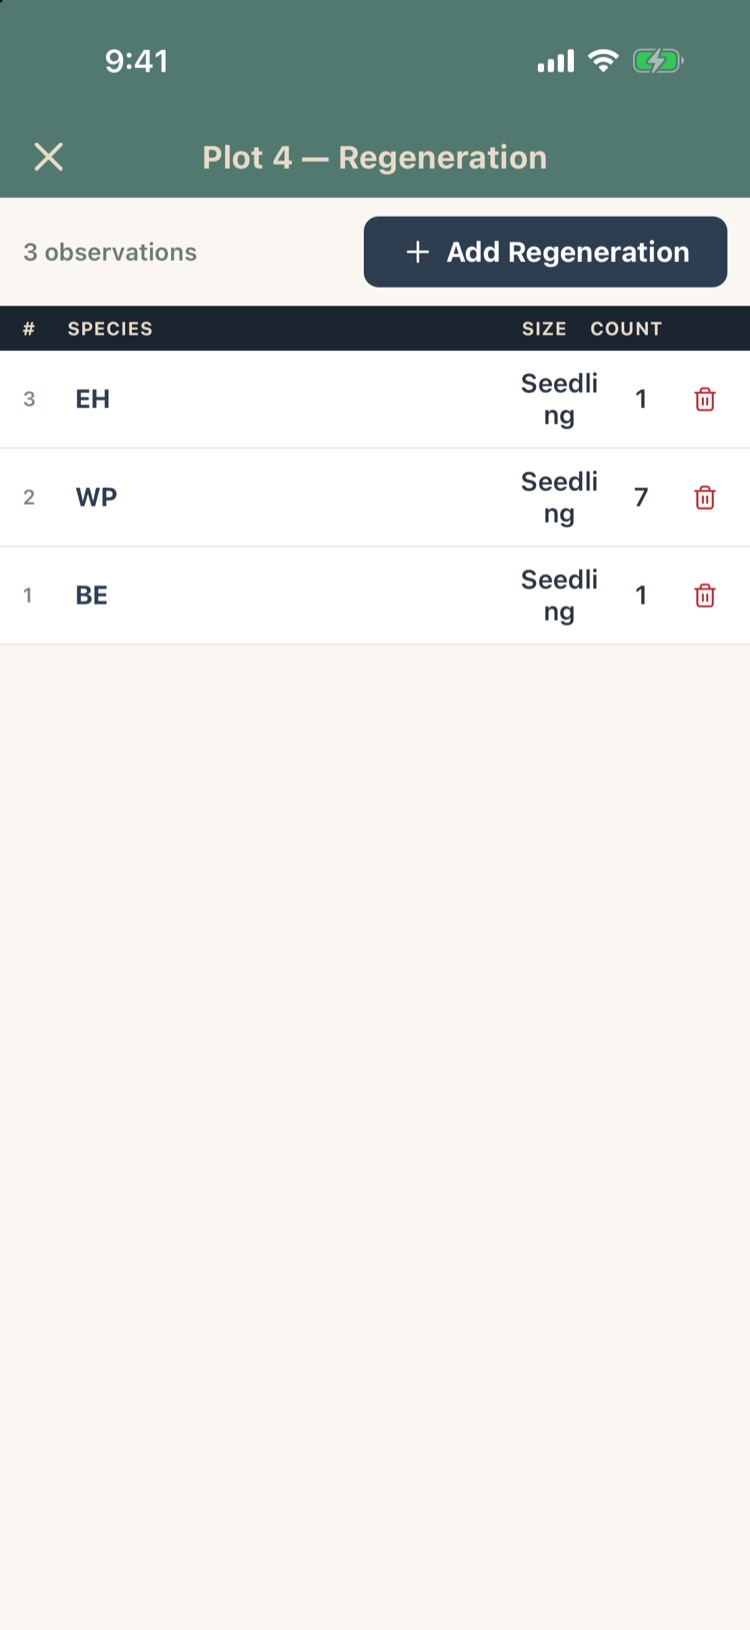
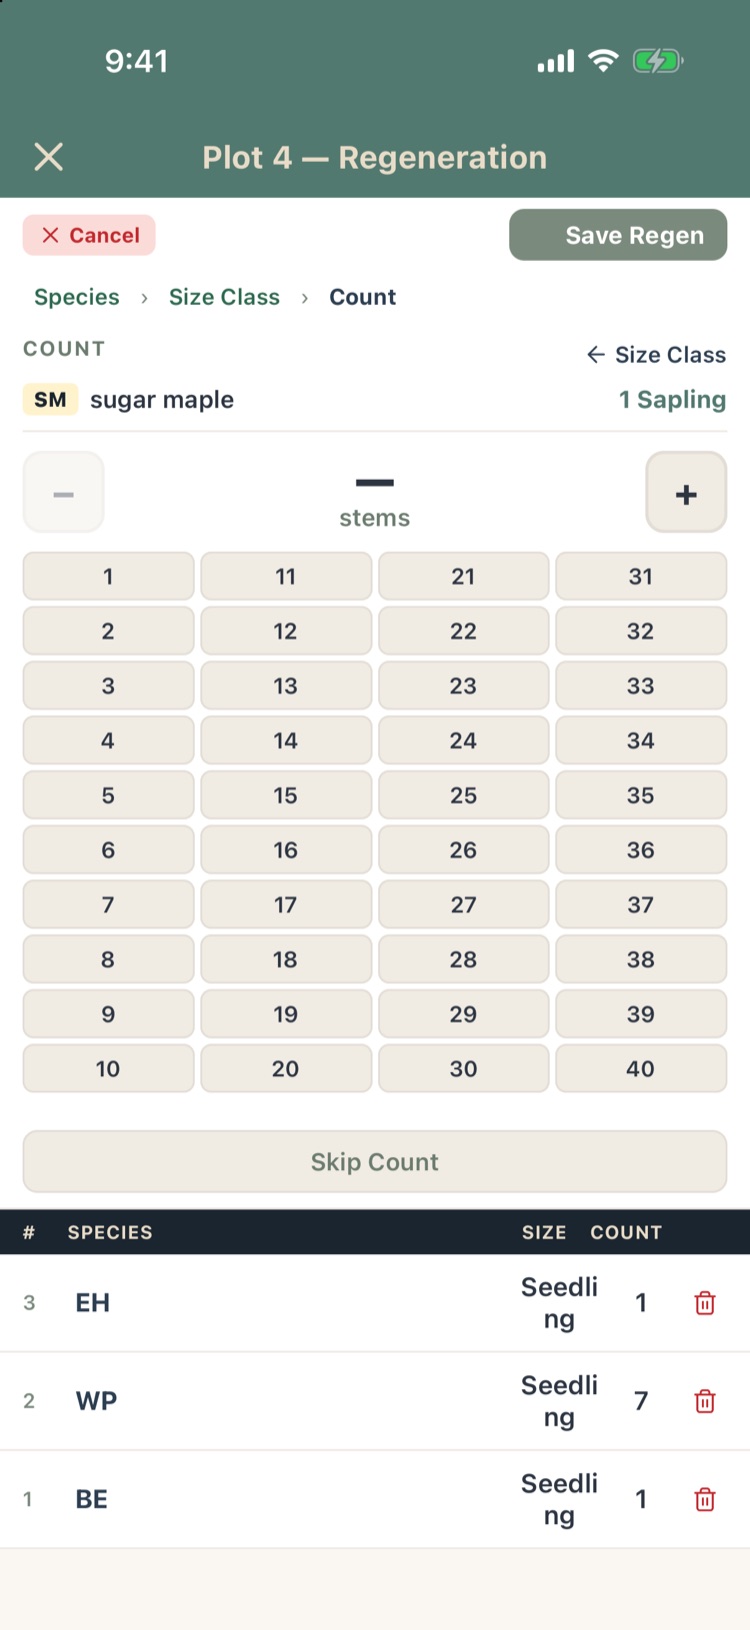
Regeneration tallies seedlings and saplings on a small plot at plot center, sized in the regeneration settings (section 6.9). Tap Regeneration, then Add Regeneration:
- Species.
- Size Class (stem diameter): Seedling, <1" sapling, then 1", 2", 3" and 4" saplings. Or Skip Size Class.
- Count: how many stems of that species and size. Tap a number, or use − and + for larger counts. Or Skip Count.
- Tap Save Regen.
Each entry is a line in the list. Tap one to edit it, or the trash to delete it. ✕ Cancel drops an entry you’re partway through. Reports convert the counts to stems per acre using the plot size for each class.
6.6Snags and dead trees Pro
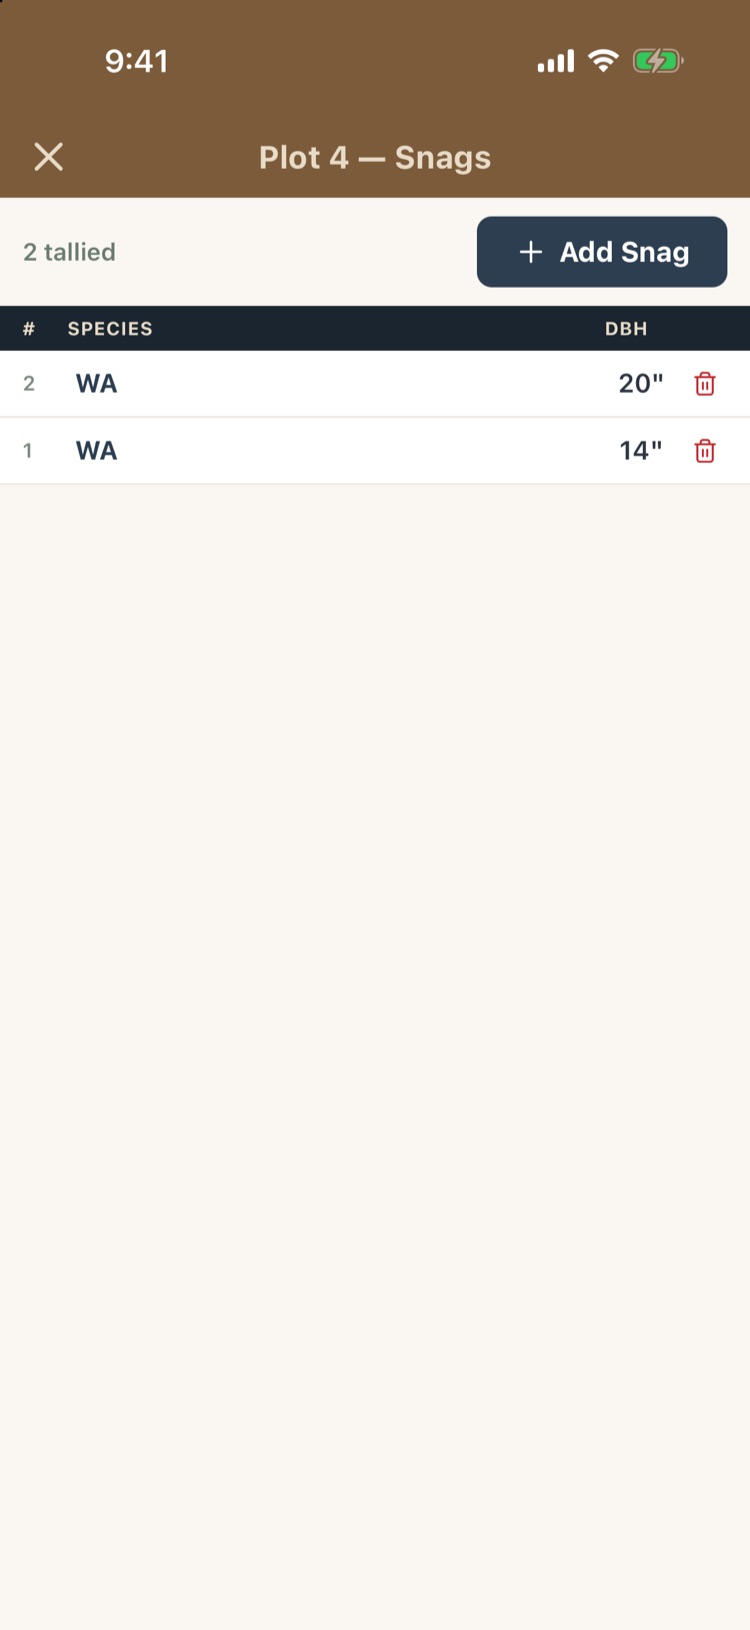
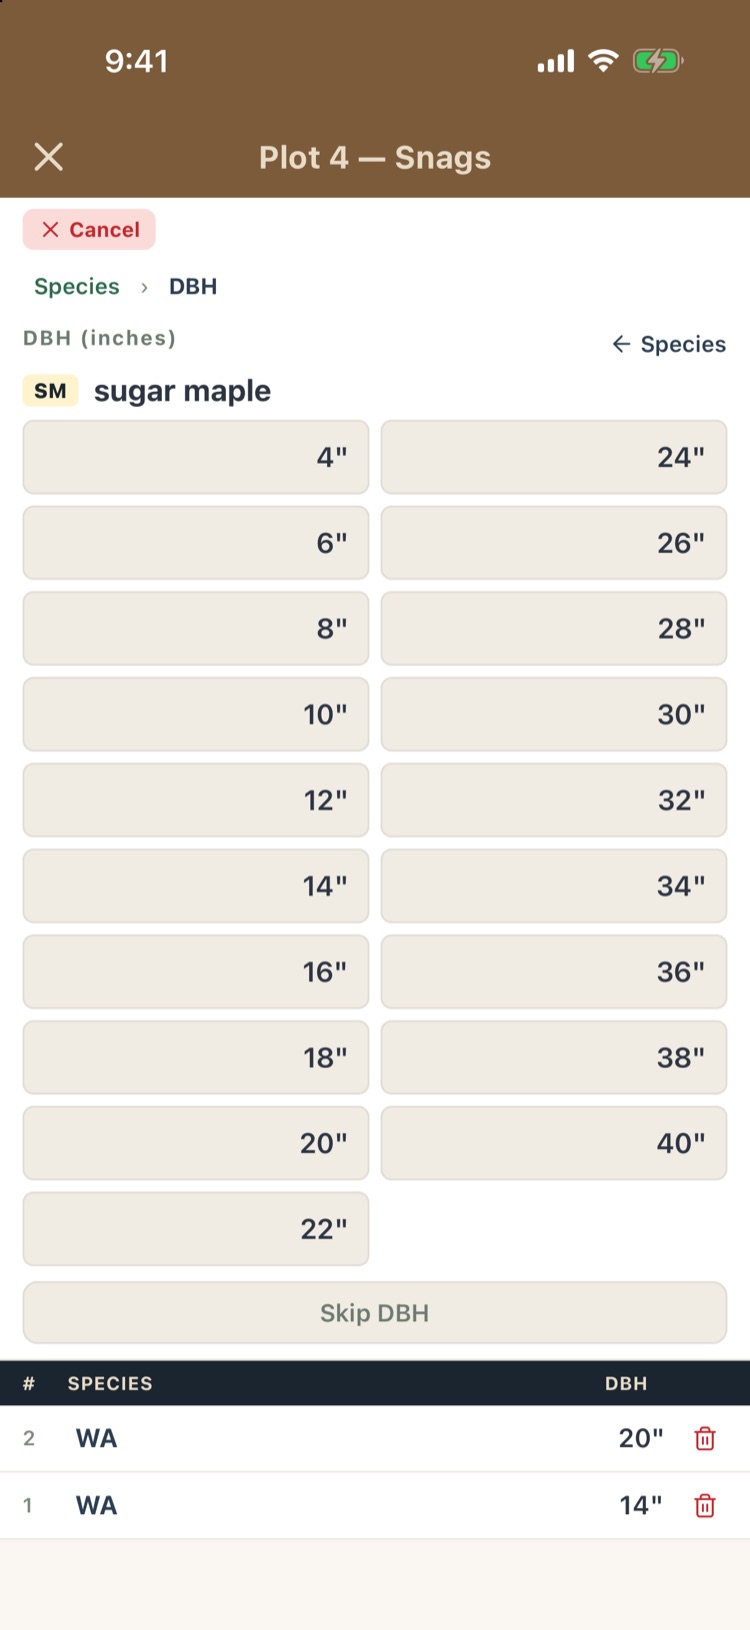
Snags are standing dead trees, tallied for wildlife habitat and stand health. They have their own sampling (a BAF or a fixed plot, set in section 6.9) and are kept out of live-tree volume.
- Tap Snags & Dead Trees, then Add Snag.
- Pick the species, then the DBH, or Skip DBH.
- Answer any snag fields you set up, such as decay class or cavity. Each can be skipped.
The snag is added to the list. Tap one to edit it; the trash deletes it.
6.7Coarse Woody Material Pro
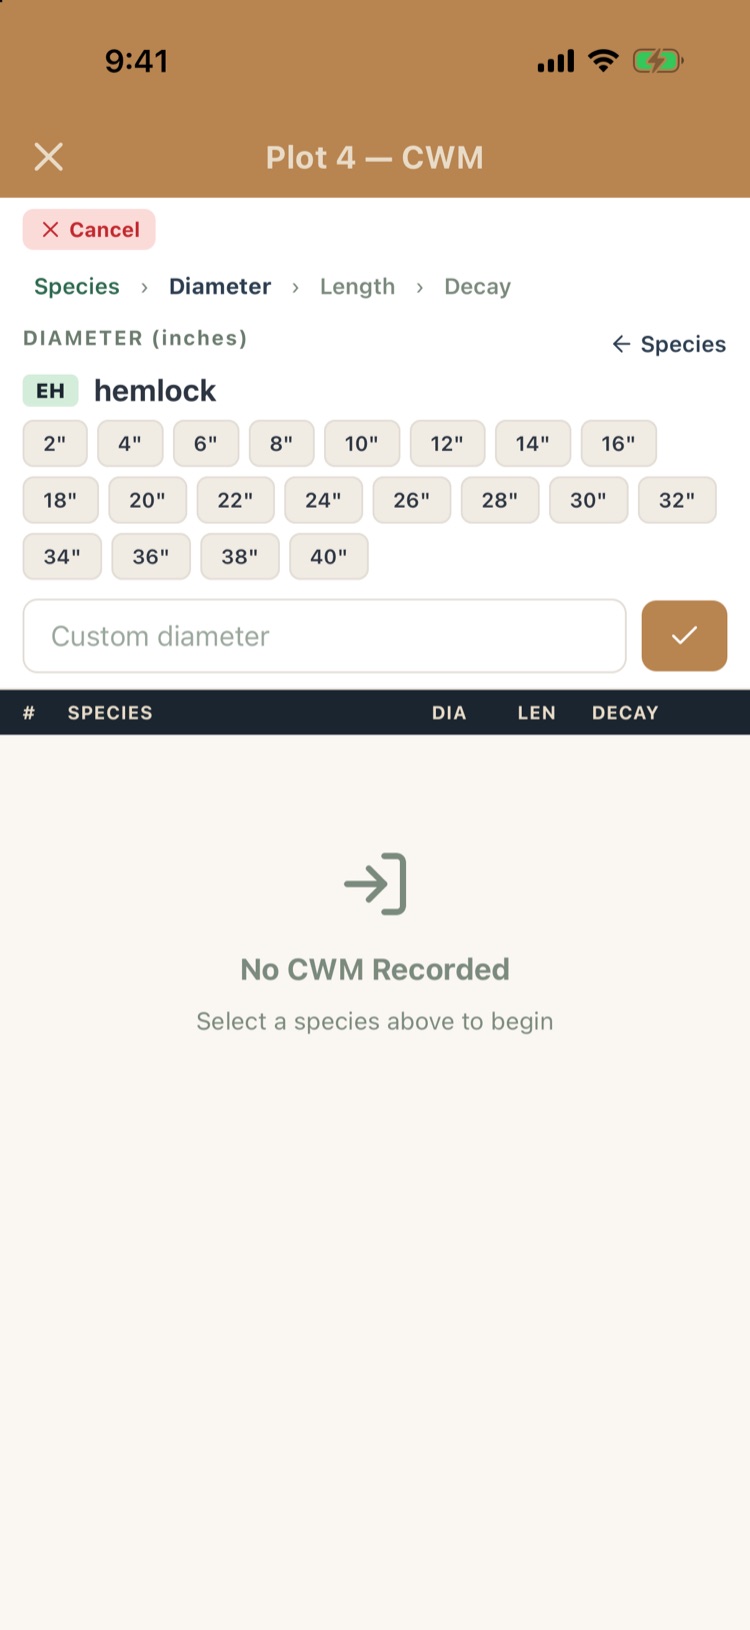
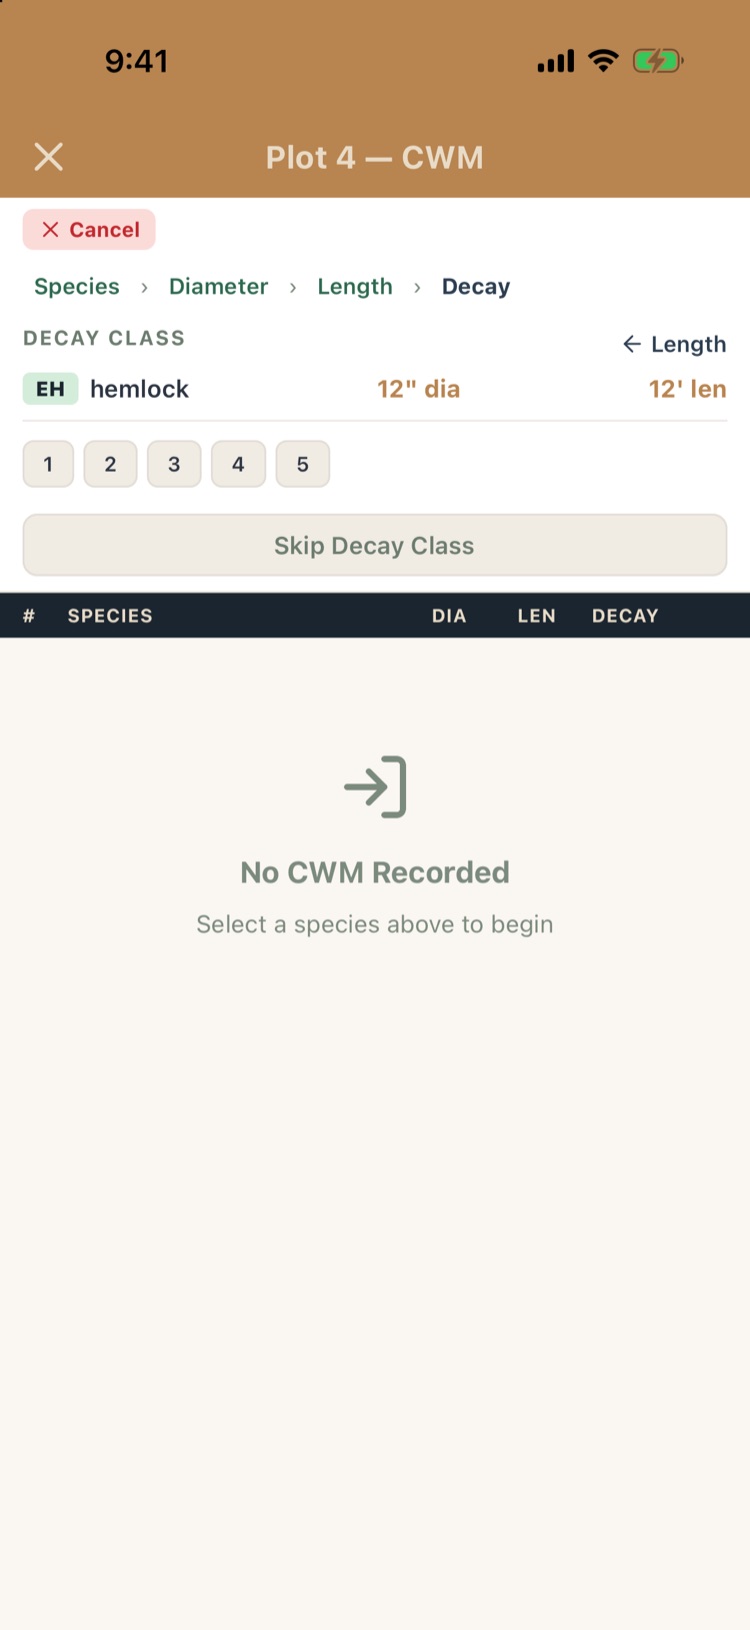
Coarse woody material (CWM, also called coarse woody debris) is dead wood on the ground. Tap Coarse Woody Material, then Add Piece:
- Species.
- Diameter in inches: tap a size, or type one under Custom diameter.
- Length in feet, or Skip Length.
- Decay class 1 to 5, if you record decay, or Skip Decay Class.
The list shows each piece’s species, diameter, length and decay class. Depending on your settings, CWM is sampled on a fixed plot, a variable-radius plot or a transect, and can use size classes instead of measured diameters (section 6.9).
6.8Custom fields, checklists and tables Pro
The bottom of the Observations screen holds plot data you define yourself (section 6.9):
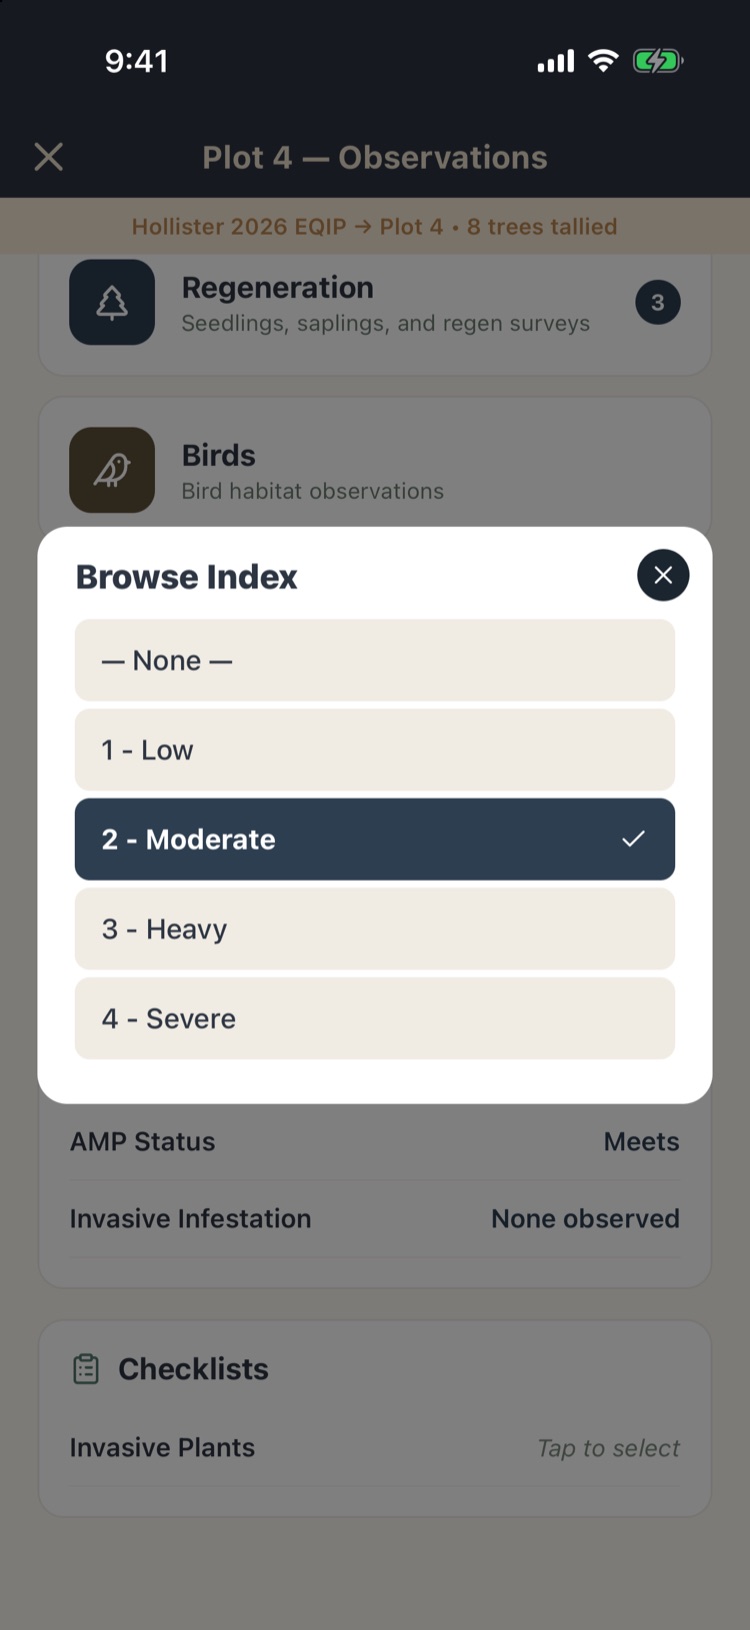
- Custom Fields take one answer each: a choice from a pick list (with — None — to clear it) or free text. For example, Browse Index: 2 - Moderate.
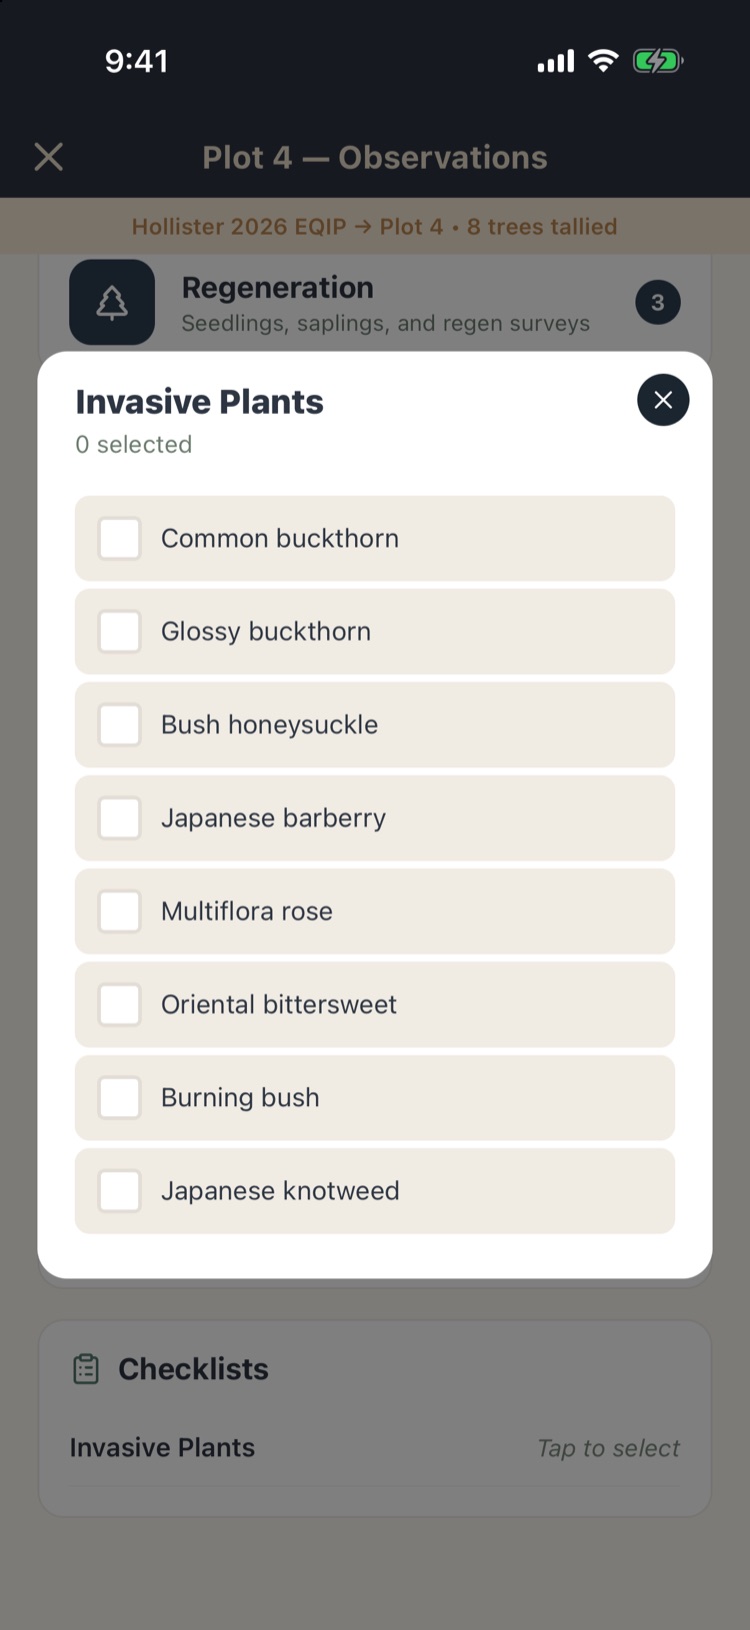
- Checklists take any number of answers, such as every invasive plant present. Tap the row, tick the items, and close.
- Tables hold several records per plot, each with up to six fields: a list of stumps, say, or a transect’s observations. Tap Add to add a record; a table with none says No records yet.
Answers appear in the plot data reports and exports, and on the Office pages.
6.9Setting up plot data
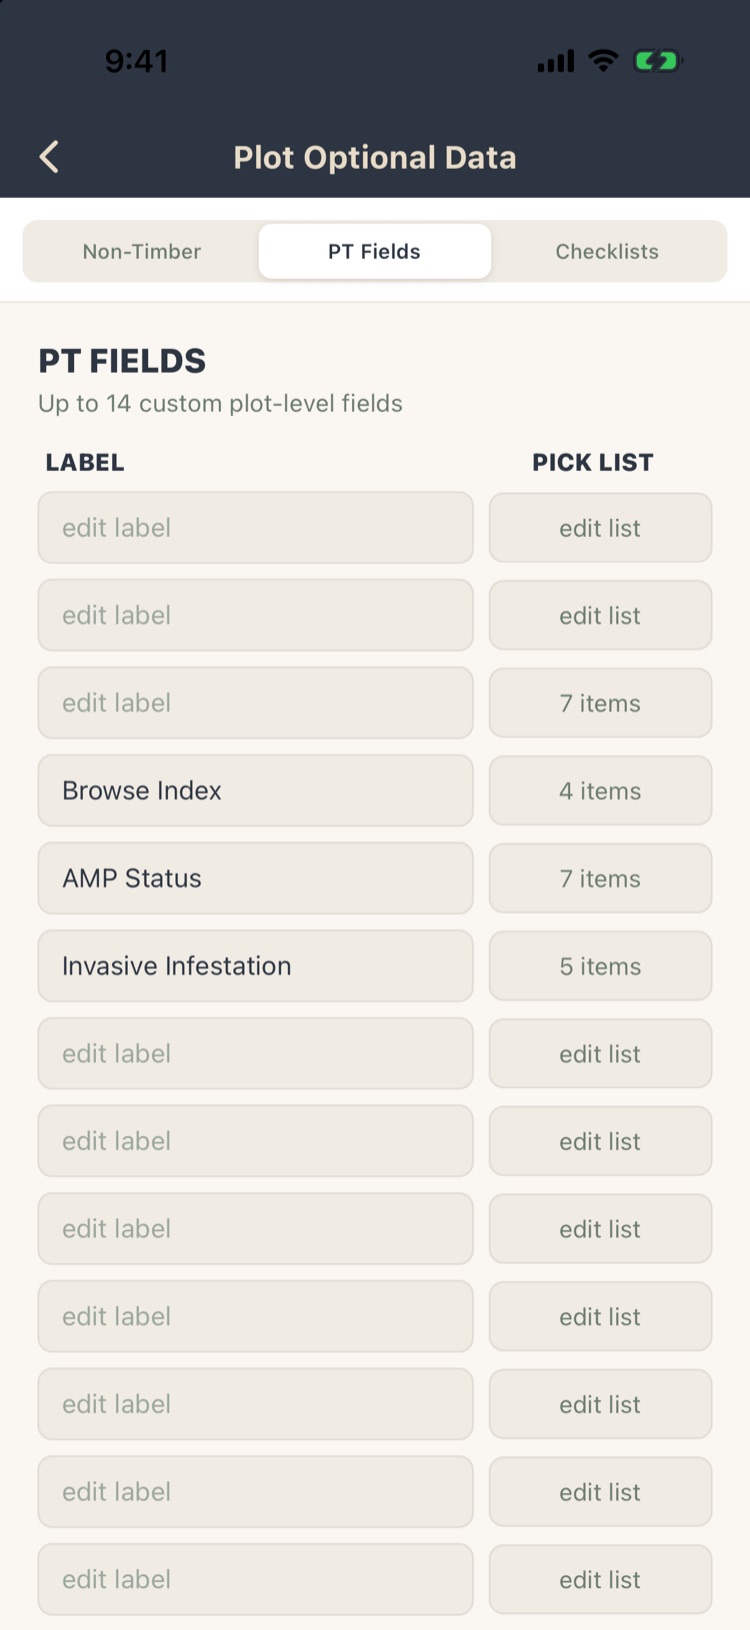
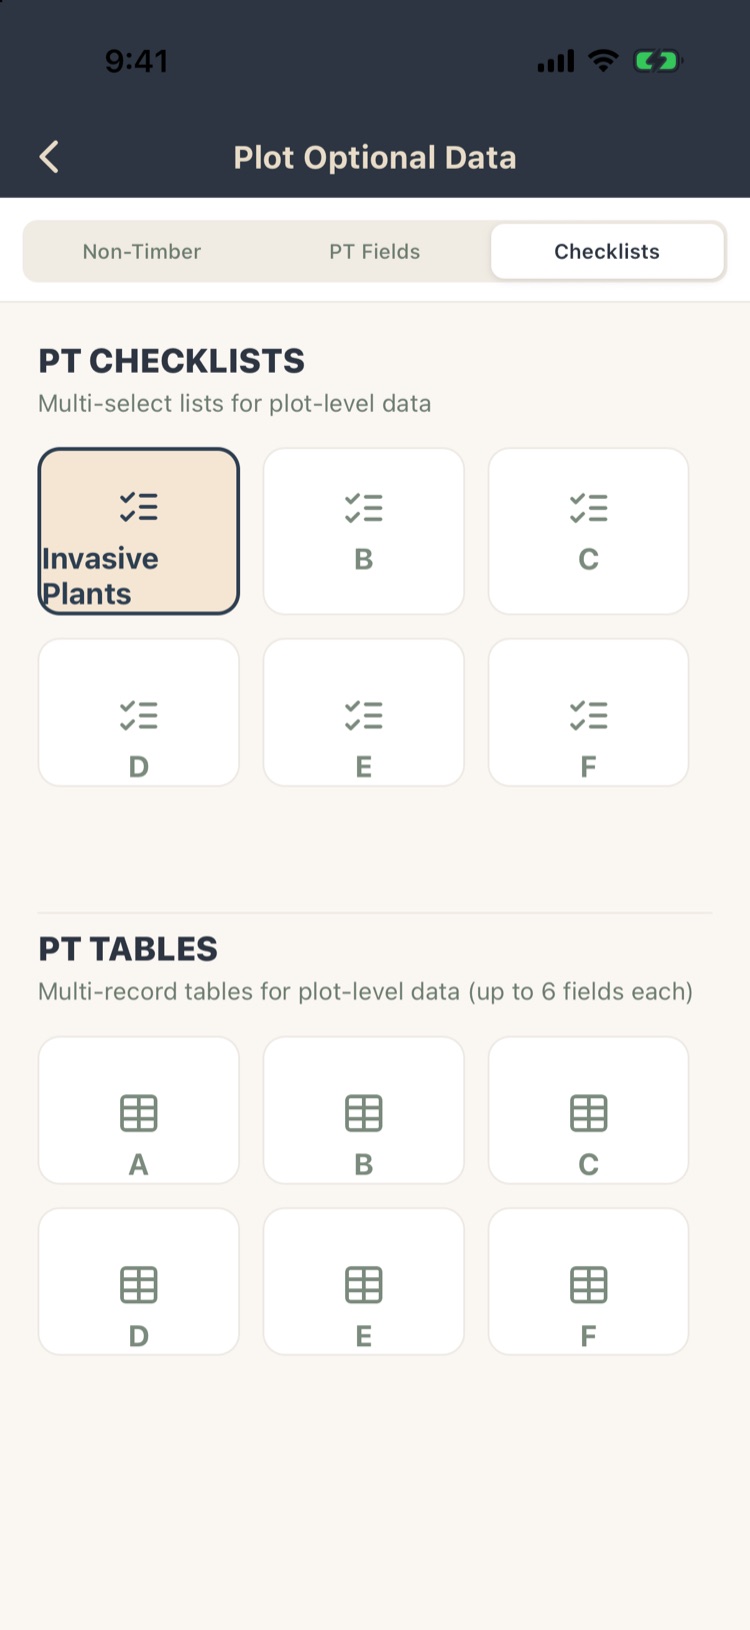
What appears on the Observations screen is set under Settings › Plot Optional Data. Like the other project settings, it comes from your template and can be changed per project (Chapter 10). It has three tabs.
Non-Timber
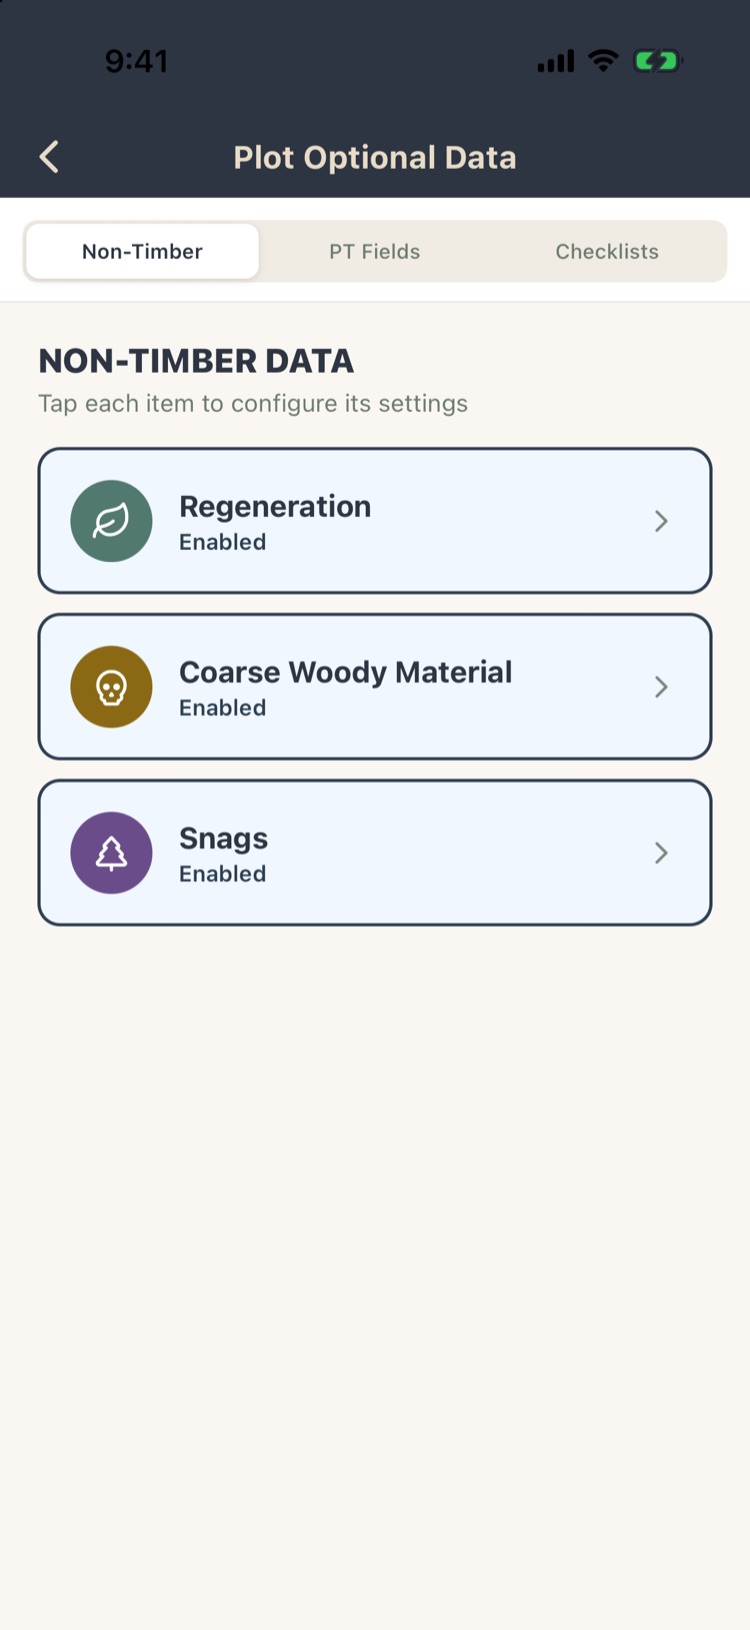
Turn Regeneration, Coarse Woody Material and Snags on or off, and tap each to set it up:
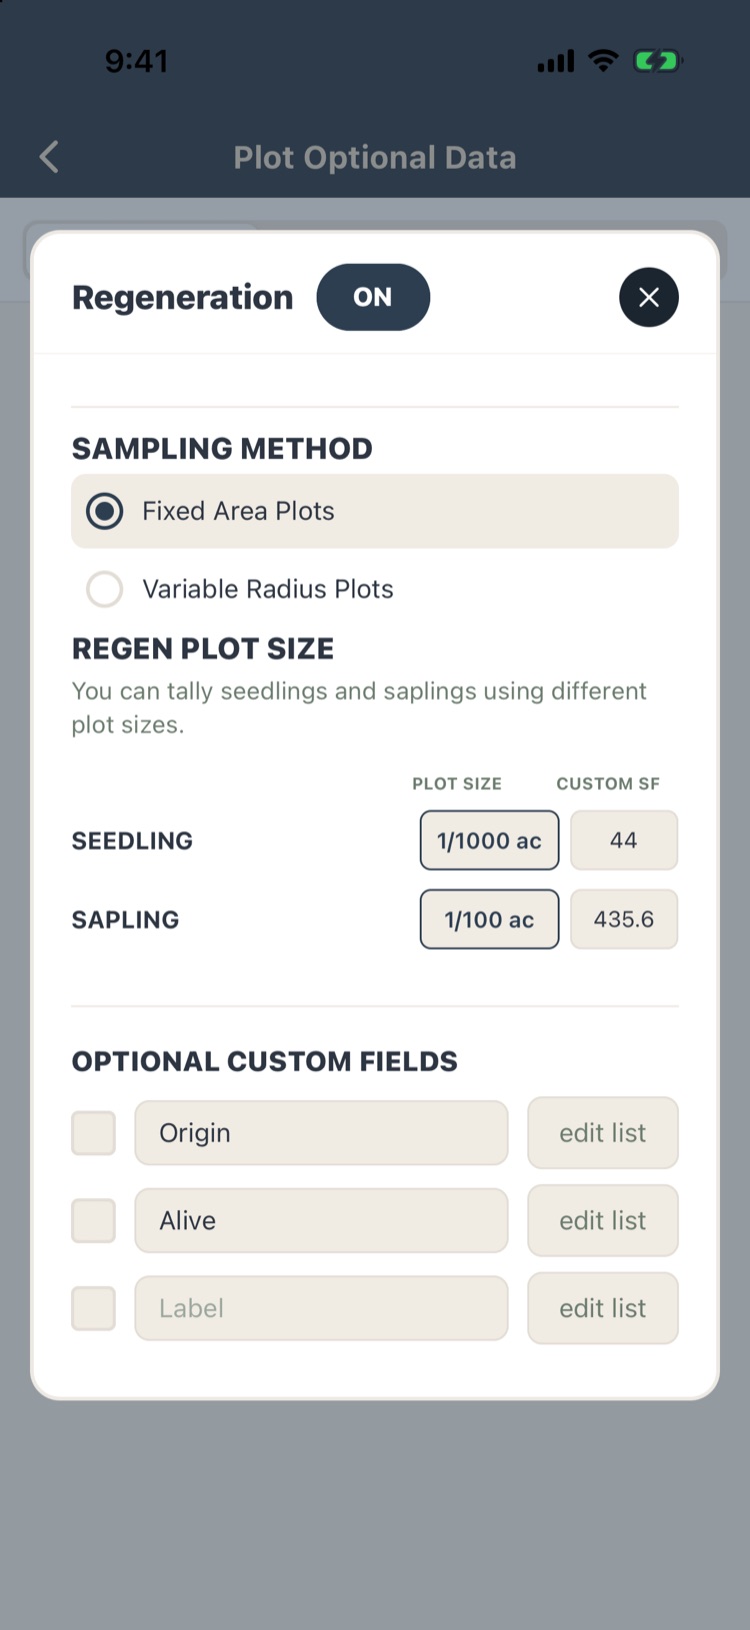
- Regeneration: fixed-area or variable-radius sampling. For fixed area, a plot size for seedlings and one for saplings (for example 1/1000 acre and 1/100 acre). Up to three custom fields, such as origin.
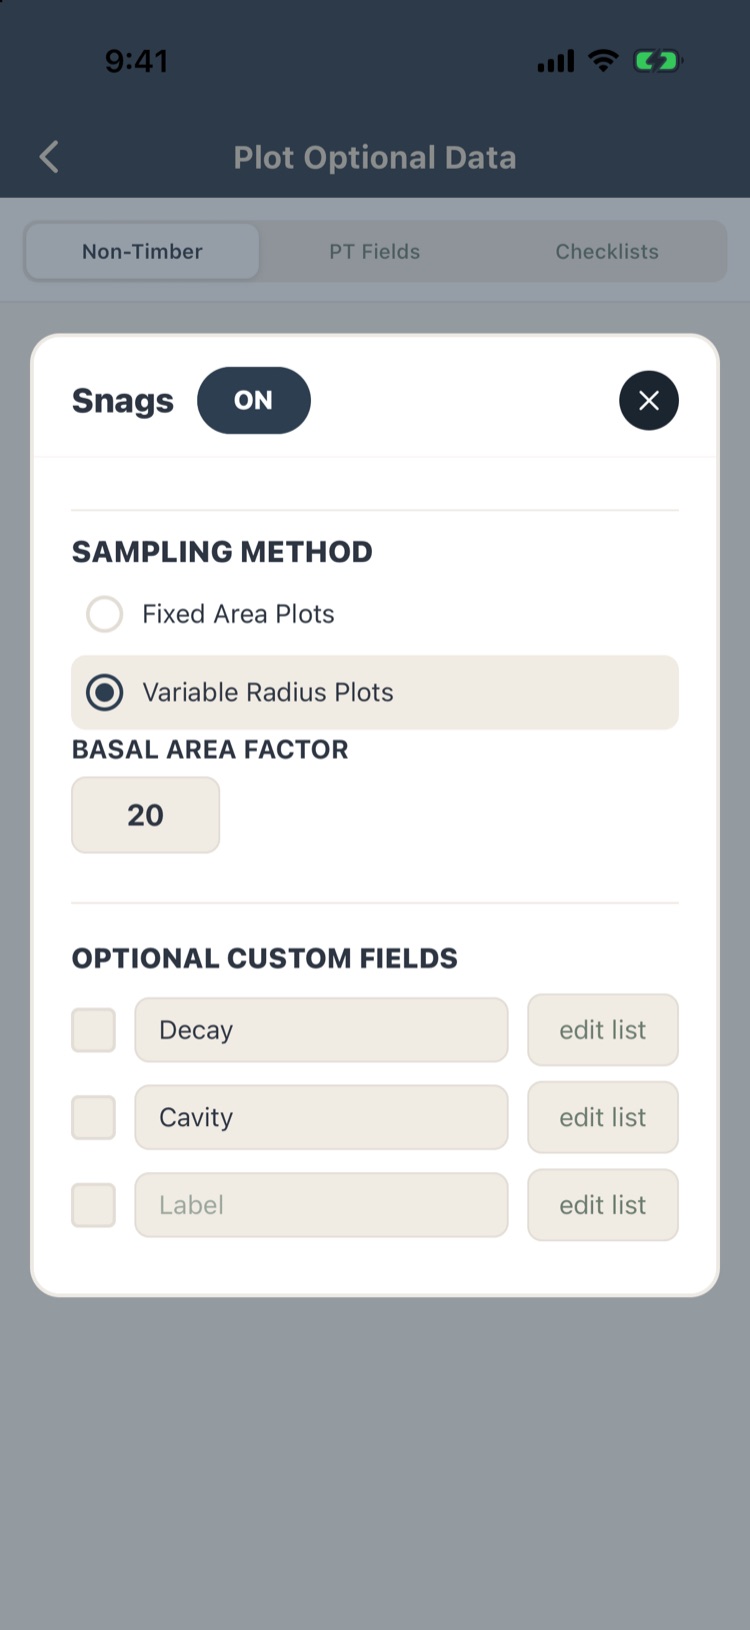
- Snags: fixed-area or variable-radius sampling and its BAF or plot size; up to three custom fields, such as decay or cavity. Tick a field to use it, and tap edit list for its answers.
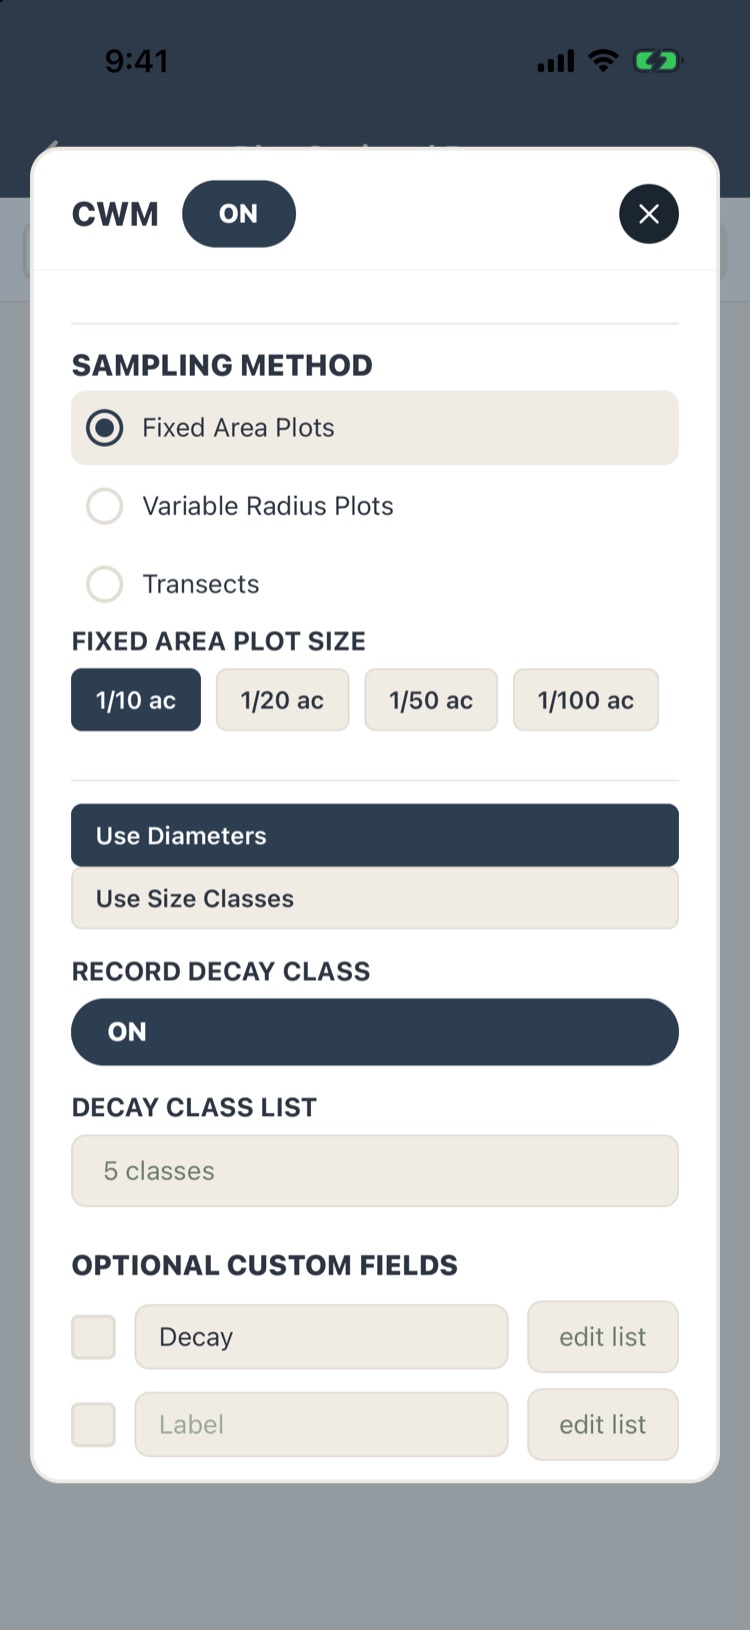
- Coarse Woody Material: fixed-area, variable-radius or transect sampling and its size; measured diameters or size classes; whether to record decay class, and the class list; custom fields.
PT Fields
Up to 14 plot fields. Type a label, and tap edit list to give it answers to pick from; leave the list empty for free text. The label is what turns a field on: a field with a list but no label stays hidden, and the screen says so under it.
Checklists
Up to six checklists (A to F), each a list of items to tick, and up to six tables (A to F), each with up to six fields per record.
Changing or removing fields partway through a project can leave earlier answers under an old heading, or hide them. Set these up in your template before beginning the project.